The Proxmox High Availability cluster feature allows to automatically migrate VMs to another cluster member node if the node where the VMs run goes down.
This feature guarantees the maximum VM availability reducing the downtime of the VM in case the node on which the VM is running fails.
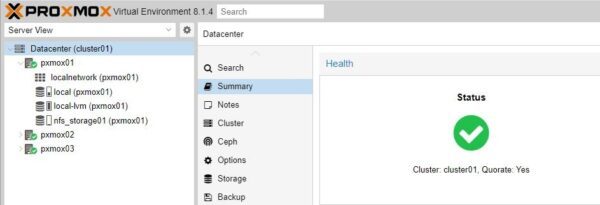
To configure HA, you need a working Proxmox cluster.
Create a Virtual Machine
To test High Availability we need to have one or more VMs running in the Proxmox cluster.
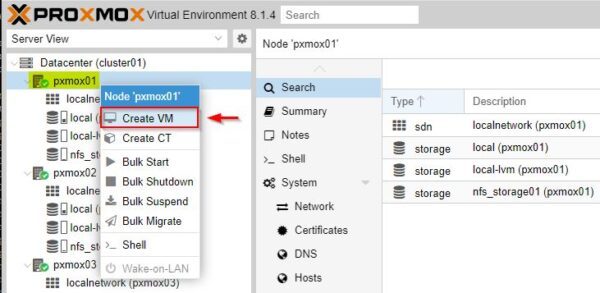
To create a new VM, right click a Proxmox node and select Create VM.
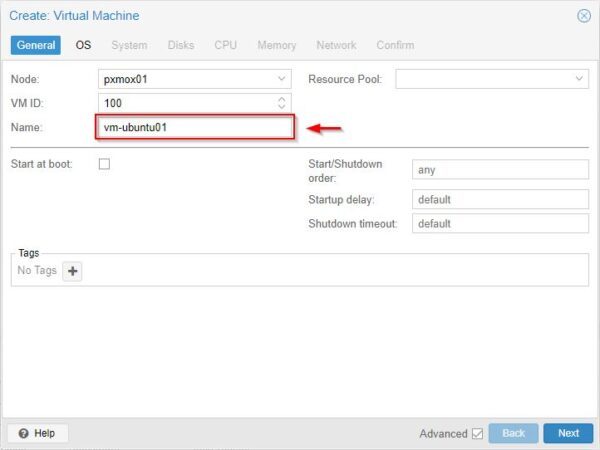
Assign a VM Name and click Next.
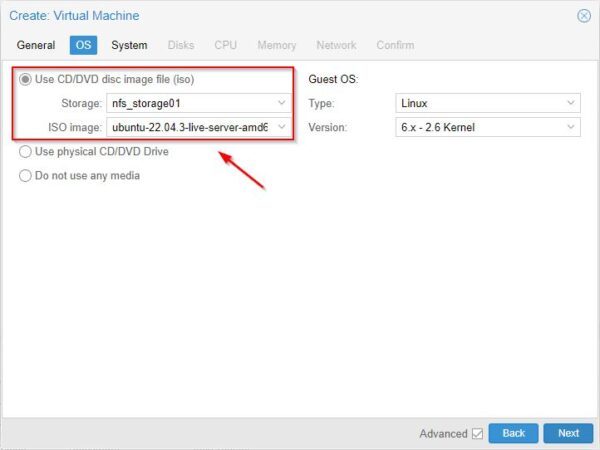
Specify how the OS should be installed. If you have an ISO available, select Use CD/DVD disc image file (iso) option and specify both Storage and ISO image to use. Click Next.
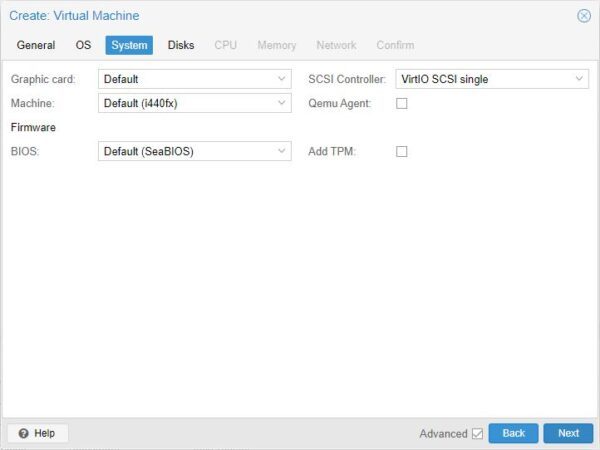
If you don't have specific requirements, click Next.
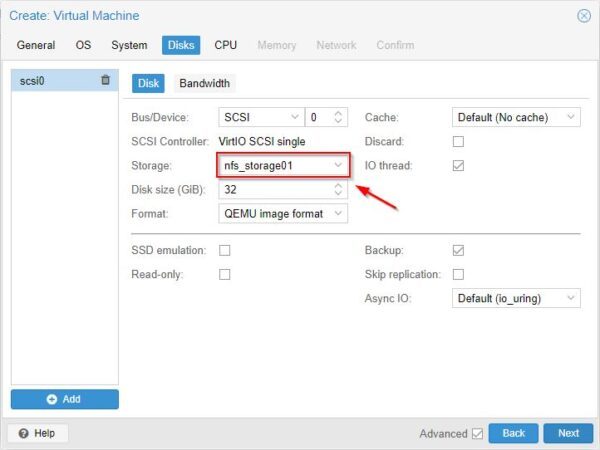
Select the Storage to save the VM and click Next.
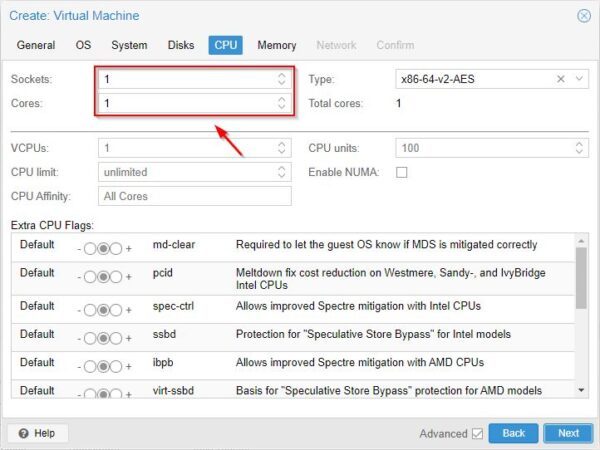
Specify Sockets and Cores for the VM then click Next.
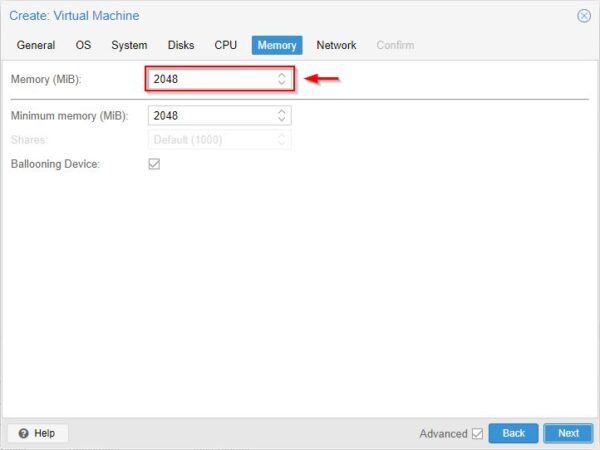
Specify the amount of Memory (MiB) to assign to the VM. Click Next.
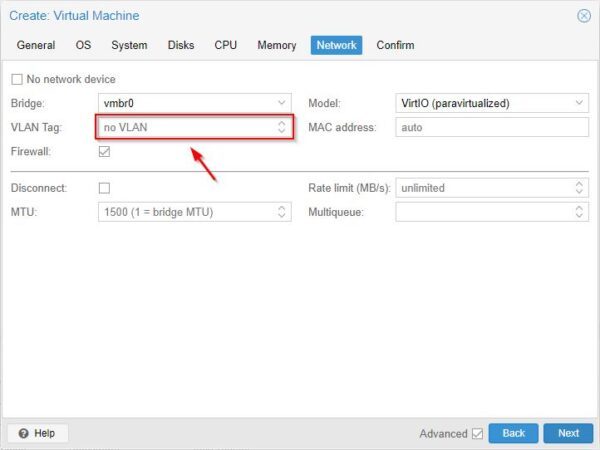
If you have any in your network, specify the VLAN Tag used by the VM. Click Next.
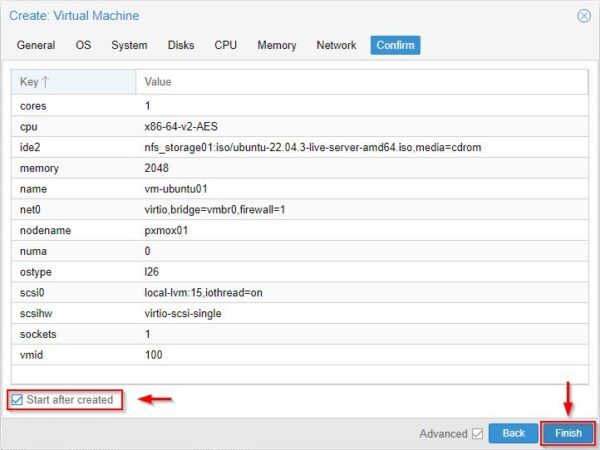
Enable Start after created option and click Finish.
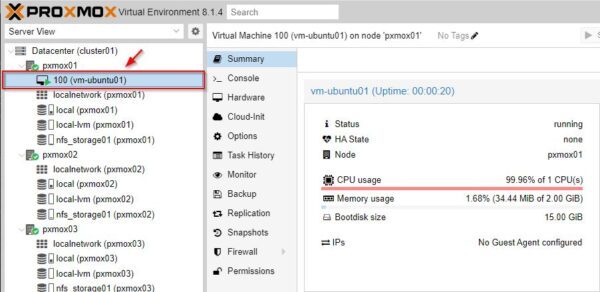
The VM is being created.
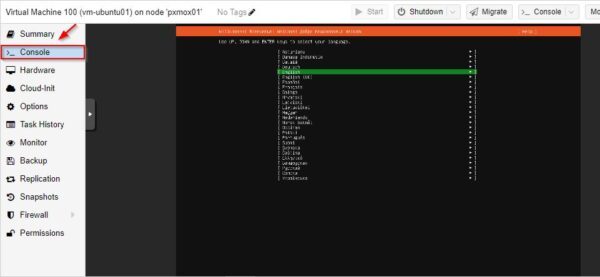
Select the VM and click Console to configure the OS.
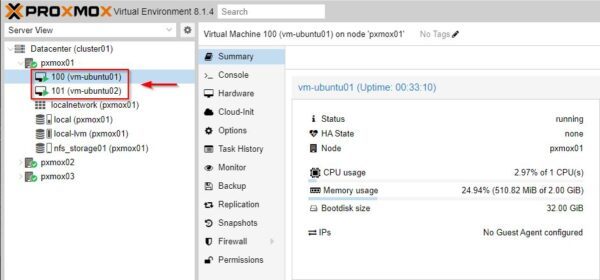
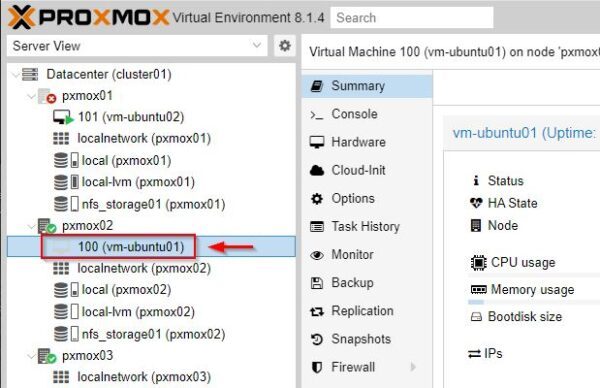
After completing the procedure, the created VMs are up and running.
Configure High Availability
To guarantee the maximum availability reducing the VM downtime, the system should be configured to leverage the High Availability (HA) feature.
To configure Proxmox High Availability, some prerequisites must be met:
- At least three nodes cluster should be used to have a reliable quorum (the configuration supports up to 16 nodes).
- A two nodes cluster is also possible, but it has some limitations.
- A shared storage.
- The Proxmox nodes must have the same version installed.
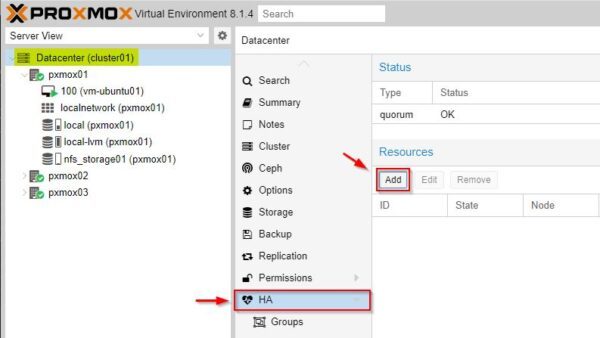
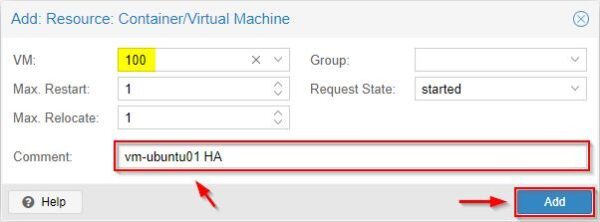
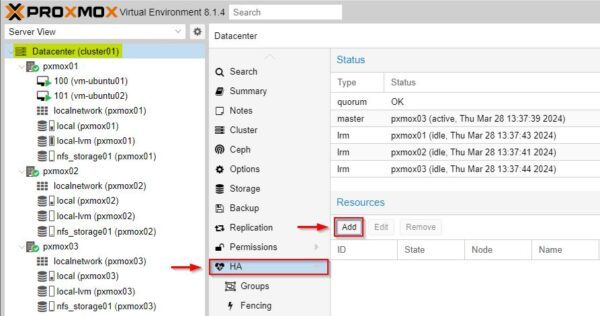
Go to Datacenter > HA and click Add.
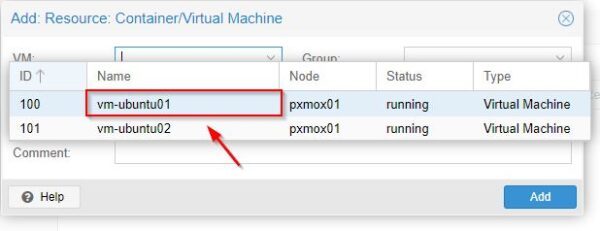
Select from the VM drop-down menu the virtual machine to protect with HA.
Optionally add a Comment then click Add.
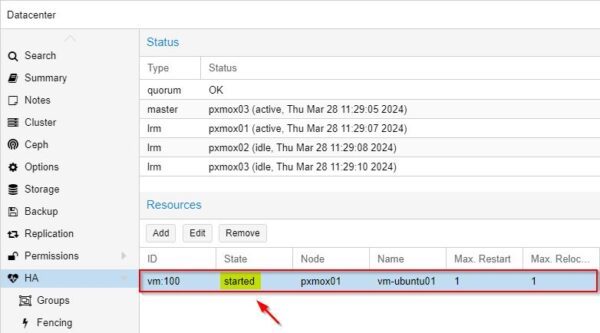
The selected VM is now protected by High Availability.
Test High Availability
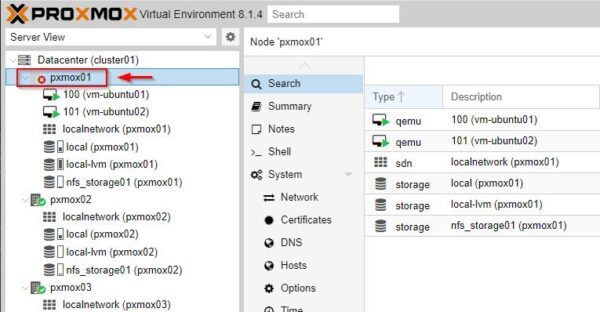
Unplug the node 01 from the network to simulate a failure (in the example a nested Proxmox cluster has been used).
The "failed" node is now displayed as offline.
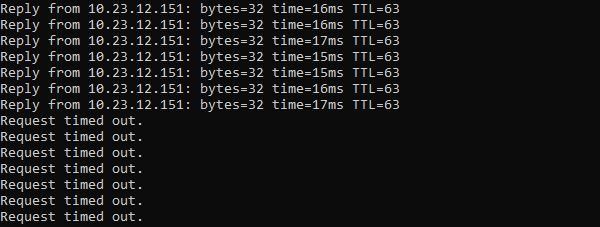
The VM protected by HA stops responding to ping.
After few seconds the VM with HA is migrated to another node of the cluster (pxmox02 node in the example). The VMs not protected by HA will stop working.
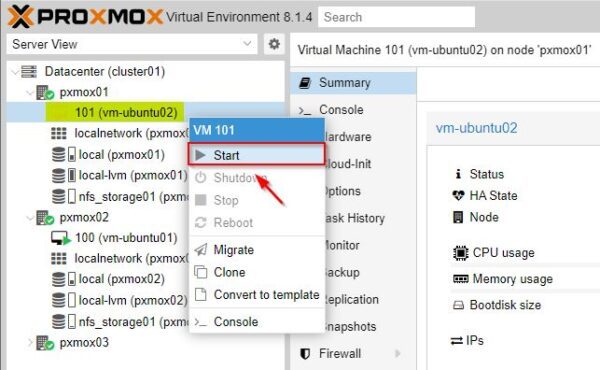
HA powers on the protected VM on the node.
The VM is now responding to ping restoring its normal functionality.
The migrated VM is now running on the new node.
The VMs not protected by HA must be started manually once the failed node has been resumed.
Configure High Availability using Groups
Compared to the previous configuration, the use of a HA Group extends the set of available operations when HA is triggered, such as Restricted, Nofailback and the Nodes to use during the VMs migration.
For example if you want to migrate VMs only to specific Nodes, the use of HA Groups allows you to achieve that goal.
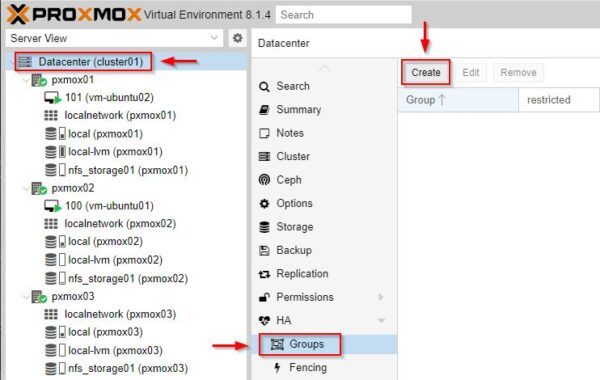
To create a new HA Group, select Datacenter > HA > Groups and click Create.
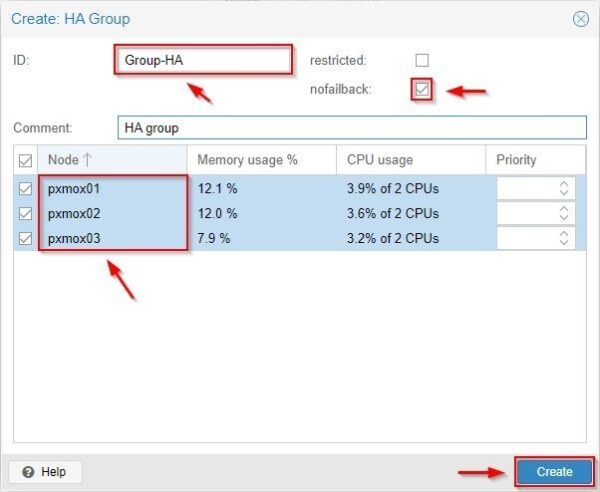
In the Create HA Group wizard, specify the requested options during HA operation:
- ID - Name of the HA Group.
- Restricted - VMs will run only on nodes belonging to this group.
- Nofailback - VMs will be moved back to the failed node once it recovers. To avoid massive VMs migrations is recommended to enable this feature.
- Node - Select which nodes should be included in this group.
Click Create when done.
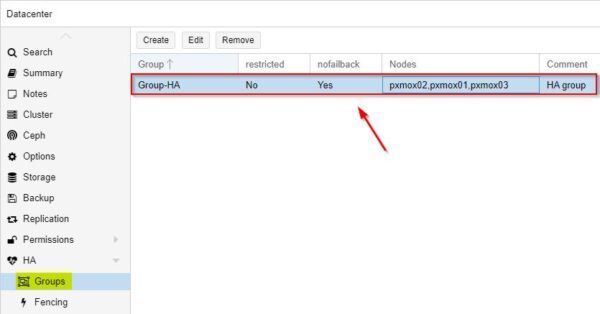
The created HA Group.
Now select HA section and click Add.
Select the VM to protect and the Group to use. Click Add.
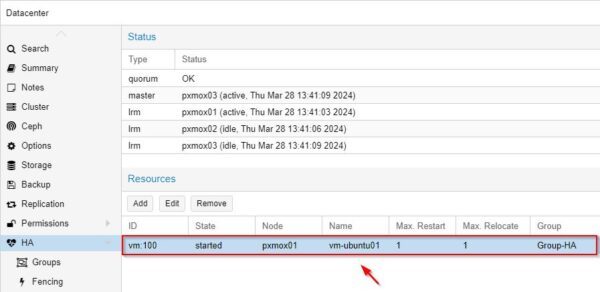
The VM is now configured to leverage HA capabilities using the selected HA Group.
If mission critical VMs are running in your Proxmox cluster, enabling HA ensure maximum availability minimizing the service disruption.








No Responses