


If your Microsoft Windows installation doesn't have the Recovery Partition configured. you can create a new Recovery Partition by following a specific procedure.
When Windows is deployed, the installation wizard automatically creates a Recovery Partition placed as last partition on the OS disk.

Create a new Recovery Partition
In this example, a Microsoft Windows Server 2022 has been configured.
Open the Command Prompt as Administrator and run the diskpart command to list the available disks:
# diskpart
# list disk

Select the disk where the OS is installed (usually disk 0).
# select disk 0

List the installed partitions.
# list part

In the displayed list, the Recovery partition is missing. Select the last partition where usually is the OS partition.
# select part 3

Since the creation of the Recovery partition requires some space, we need to shrink the selected partition by some GB (in the example 8 GB). Make sure you have enough free space in the OS partition.
# shrink desired=8192

Create a new partition.
# create partition primary

Format the new partition as NTFS with label Recovery.
# format quick fs=ntfs label="Recovery"

Mark the created partition as GPT.
# set id = "de94bba4-06d1-4d40-a16a-bfd50179d6ac"

Assign a letter to the new partition to copy the required files later.
# assign letter=R

Exit from diskpart.
# exit

Make sure the recovery environment is disabled.
# reagentc /disable

Create a new directory in disk C:\ (DISM in the example).
# mkdir c:\DISM

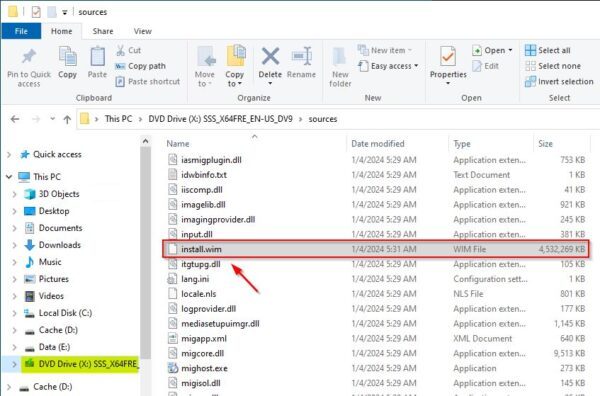
Mount the Windows installation media and identify the install.wim file location.
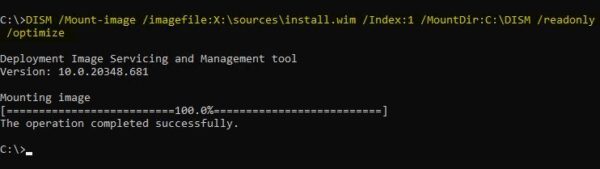
Mount the install.wim.
# DISM /Mount-image /imagefile:D:\sources\install.wim /Index:1 /MountDir:C:\dism /readonly /optimize
Copy WinRe.wim and ReAgent.xml files to C:\Windows\System32\Recovery folder.
# robocopy /MIR /XJ C:\DISM\Windows\System32\Recovery\ C:\Windows\System32\Recovery

When the copy operation has been completed, unmount the image.
# dism /unmount-image /mountdir:C:\dism /discard

Now create a recovery directory in the created partition.
# mkdir R:\Recovery\WindowsRE

Copy the Winre.wim file to the created folder.
# xcopy /h C:\Windows\System32\Recovery\Winre.wim R:\Recovery\WindowsRE

Enable the recovery image.
# reagentc /setreimage /path R:\Recovery\WindowsRE /target C:\Windows

Enable the recovery environment.
# reagentc /enable

Check if the recovery environment is configured to the correct partition.
# reagentc /info

Open diskpart and remove the letter previously assigned to the recovery partition.
# diskpart
# list disk
# select disk 0
# list part
# select part 4
# remove letter=R
# exit

The procedure is now complete and the Recovery Partition has been created successfully.


Finally! After hundreds of sites I went through, yours was the only one that worked. I thank you!
After creating the partition, you should run the command
gpt attributes =0x8000000000000001
This will identify the partition as Recovery Partition in Windows Disk Management.
Otherwise your guide works like a treat!
There is an extra space in command:
robocopy /MIR /XJ C:\DISM \Windows\System32\Recovery\ C:\Windows\System32\Recovery
Should be:
robocopy /MIR /XJ C:\DISM\Windows\System32\Recovery\ C:\Windows\System32\Recovery
Space removed. Thanks.
Also I had to use this to convert .esd file to .wim:
https://www.intel.com/content/www/us/en/support/articles/000023992/memory-and-storage/intel-optane-memory.html
Thanks for this. Easy to follow and does the job.