Nakivo Backup & Replication 9.2 provides the capability to backup Office 365 mailboxes saving data on-premises for a faster and secure access.
To process an Office 365 Backup Job, Nakivo requires some configuration in Azure to grant the correct permissions to access.
Register a new application in Azure
To allow the backup of Office 365 mailboxes, you need to configure the application in Azure and grant the correct permissions. From your favorite browser type the address https://portal.azure.com and enter the credentials to access.

Click on Azure Active Directory icon.
Access the App registrations section and click + New registration to register a new application.
Enter a Name of the new application and select the Supported account types based on your environment then click Register.
Application (client) ID and Directory (tenant) ID are generated for the new application. Write down these values since they are required to configure Office 365 backup in Nakivo.
Now access the Certificates & secrets section and click + New client secret.
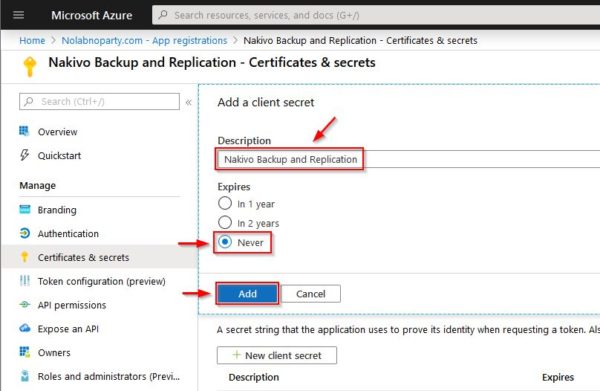
Enter a Description, the Expires value and click Add.
The client secret is generated. Write down this value since it is required by Nakivo.
Access the API permissions section and click + Add a permission. You need to add the following permissions:
- Mail.ReadWrite
- User.Read.All
Make sure to select Application permissions type in Microsoft Graph API area then click Grant admin consent for domain.com button to grant selected permissions.
Add Office 365 to the Inventory
In order to configure the Backup Job for Office 365 mailboxes, the Office 365 tenant must be registered in the Inventory first.
Go to Nakivo's Inventory page and click Add New > Microsoft office 365 account.
Specify the Display name and enter Tenant ID, Azure Client ID and Azure Client secret previusly noted. Click Add.
If you receive this error, make sure the correct application permissions have been assigned to the used account.
Office 365 has been registered successfully.
Create the Microsoft Office 365 Repository
Next step is the creation of the repository to store Office 365 data. Go to Repositories tab and click Add Backup Repository > Create new backup repository.
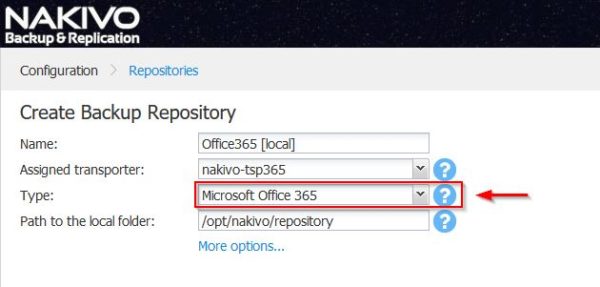
Specify a Name and the Assigned transporter then select Microsoft Office 365 from the Type drop-down menu. Enter the Path to the local folder to store backups.
The repository has been created successfully.
Configure an Office 365 Backup Job
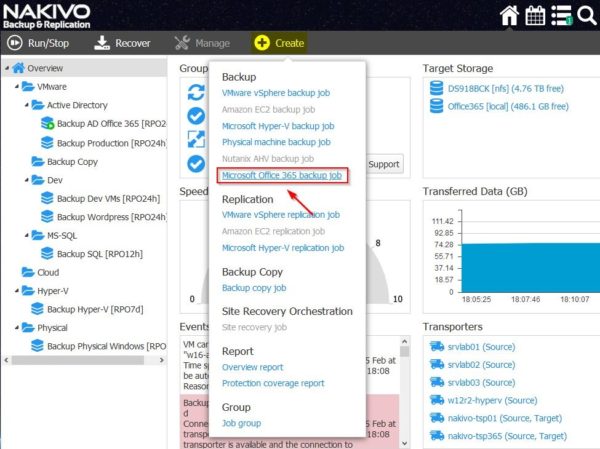
From Nakivo's Dashboard select Create > Office 365 backup to configure a new Backup Job.
Select mailboxes to backup and click Next.
From the Destination drop-down menu select the target Repository then click Next.
Specify the requested Schedule and click Next.
Specify the desired Retention and click Next.
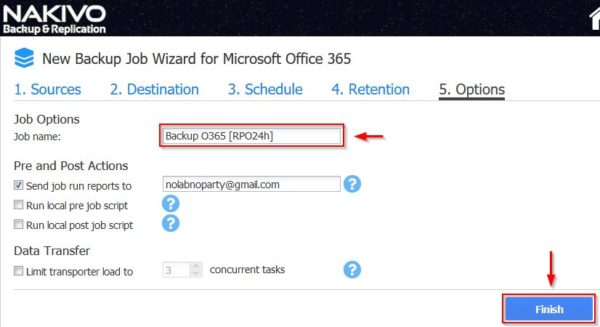
Enter a Job name and click Finish.
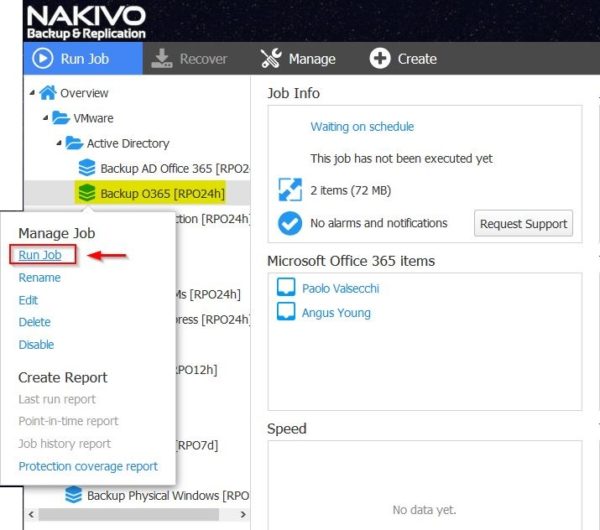
Right click the just created Backup Job and select Run Job to start the job immediately.
Select Run for all items and click Run.
The Backup Job is being executed.
The backup has been completed successfully.
The Backup for Office 365 capability is included in Nakivo Backup & Replication 9.2 and it is available to download as 30-day free trial.


