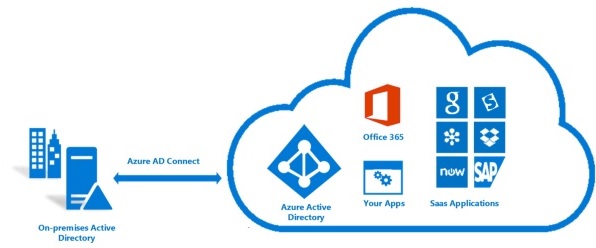
Azure AD connect is the solution used to connect the on-premises directory with Azure AD to implement the SSO method for Office 365 environment.
Azure AD provides a common identity for accessing both cloud and on-premises resources giving the users the following advantages:
- Users can use a single identity to access on-premises applications and cloud services such as Office 365.
- Administrators have a single tool to provide an easy deployment experience for synchronization and sign-in.
- Azure AD Connect replaces older versions of identity integration tools.
Prerequisites
To install Azure AD Connect you need the following components:
If one component is missing from your system, you will receive a warning message.
Install Azure AD Connect
From Microsoft website, download the tool Azure AD Connect and run the installer to begin the installation.
Accept the EULA and click Continue.
Select Use express settings to configure a standard environment otherwise Customize to specify a custom configuration. Click Customize to check available options.
Here you can specify some working parameters (installation location, SQL Server, service account, sync groups). Select and configure the required optional parameters then click Install.
Required components are being installed.
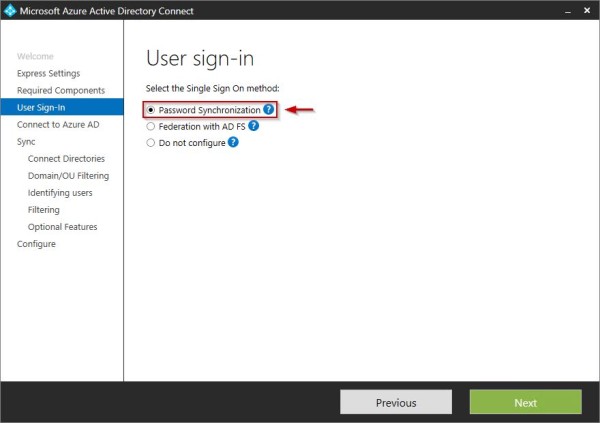
Depending on your network, select the SSO method you wish to use. If AD FS service is already available in your environment, select Password Synchronization option to sync users' AD passwords with Azure. Click Next to continue.
Enter the Azure AD credentials then click Next.
System verifies the credentials specified.
Enter the parameters for the on-premises directory or forest to sync then click on Add Directory button.
The specified Active Directory is now displayed under Configured Directories area. Click Next to continue.
Select the Domains and OUs to sync and click Next.
If you don't have particular requirements, select Users are represented only once across all directories option to specify how users should be identified in the on-premises directory. Click Next.
Select Synchronize all users and devices if you don't need to sync only specific groups. Click Next to continue.
Select optional features you may need then click Next.
Check Start the synchronization process as soon as the configure completes option and click Install.
System is being configured.
When the installation has completed successfully, the synchronization is initiated. Click Exit to exit the wizard.
Login to Office 365 portal to access the administration console.
Select Users > Active users tab in the left pane to display synced AD users.
Change configuration
After the initial installation of Azure AD Connect, you can change the configuration running the wizard from the desktop shortcut. The wizard provides some new options in the form of Additional tasks.
Just select the task you want to access to change the parameters. Main tasks you can perform are the following:
- View current configuration - allows you to view your current Azure AD Connect setup including general settings, synchronized directories, sync settings, etc.
- Customize synchronization options - allows you to change the current AD configuration or enabling sync options such as user, group, device or password write-back.
- Configuring staging mode - this allows you to stage information that will later be synchronized to preview the synchronizations before they occur.
Azure AD Connect is the solution that replaces the tool DirSync now deprecated.


