To secure your websites with the https protocol, the use of SSL certificates allow Virtual Hosts traffic over SSL in Apache web server.
Previous Apache versions each Virtual Host running over SSL needed its own certificate and a unique IP address. Since SNI (Server Name Indication) TLS extension has been implemented, Virtual Hosts can now share a single SSL certificate and IP address.
Prerequisites
- CentOS 6 minimal installation
- mod_ssl module
Procedure
Install the mod_ssl module needed by Apache to work with SSL.
# yum install mod_ssl
For an easier management you could create a dedicated location in your system to store the certificates.
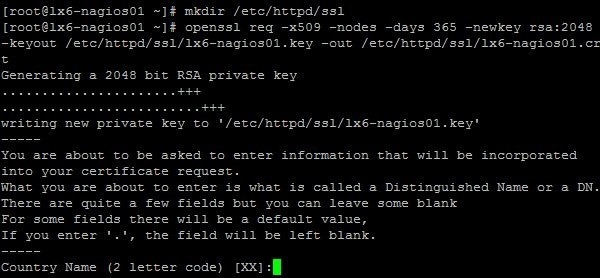
# mkdir /etc/httpd/ssl
Using the openssl command you have to generate both .key and .crt certificates and store them in the created folder.
# openssl req -x509 -nodes -days 365 -newkey rsa:2048 -keyout /etc/httpd/ssl/lx6-nagios01.key -out /etc/httpd/ssl/lx6-nagios01.crt
Provide all the info needed to be incorporated into the certificate request.
The procedure creates two certificates "self signed" stored in the directory specified /etc/httpd/ssl.
Edit the configuration file /etc/httpd/conf.d/ssl.conf and set the correct certificates location path.
# vi /etc/httpd/conf.d/ssl.conf
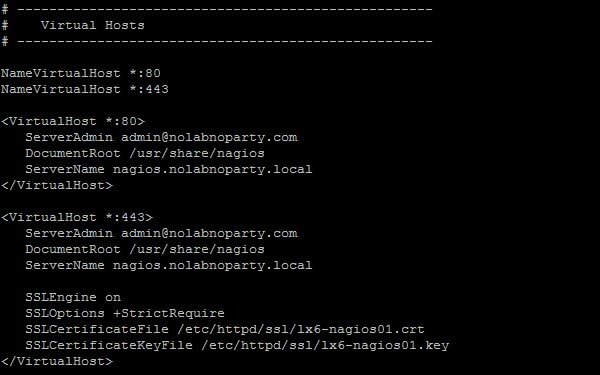
Edit the Apache configuration file and define the entries in the Virtual Hosts section that will use SSL.
NameVirtualHost *:80
NameVirtualHost *:443

<VirtualHost *:80>
  ServerAdmin admin@nolabnoparty.com
  DocumentRoot /usr/share/nagios
  ServerName nagios.nolabnoparty.local
</VirtualHost>

<VirtualHost *:443>
  ServerAdmin admin@nolabnoparty.com
  DocumentRoot /usr/share/nagios
  ServerName nagios.nolabnoparty.local
  SSLEngine on
  SSLOptions +StrictRequire
  SSLCertificateFile /etc/httpd/ssl/lx6-nagios01.crt
  SSLCertificateKeyFile /etc/httpd/ssl/lx6-nagios01.key
</VirtualHost>
# vi /etc/httpd/conf/httpd.conf
Restart the service Apache.
# service httpd restart
From your browser type the https address of your virtual host to check if you can access the site via SSL.
https://virtualhost.domain.com
If you can access the site your system is working properly. You can now start adding new Virtual Hosts to your configuration.


Great article, worked perfectly for me! Thanks! 🙂