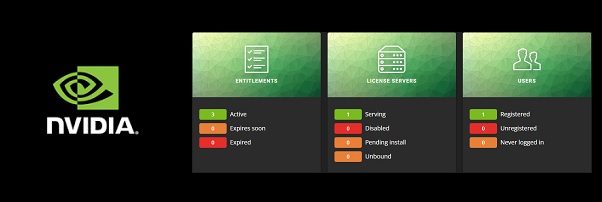
NVIDIA License System (CLS or DLS) is the software solution used to provide licenses to NVIDIA software products to take benefit of vGPUs installed in your ESXi hosts.
Software applications such as CAD or VDI environments with high graphic resources demanding require a valid license to enable NVIDIA graphic capabilities when one or more vGPUs are installed in the system.
Because the legacy vGPU License Manager is deprecated, organizations that use NVIDIA solutions need to implement the new NVIDIA License System before the legacy model reaches the end of life on July 31, 2023.
NVIDIA License System currently supports two types of service instances:
- Cloud License Service (CLS) - hosted on the NVIDIA licensing portal
- Delegated License Service (DLS) - hosted on-premises for offline licenses assignment
Deploy the DLS NVIDIA License System
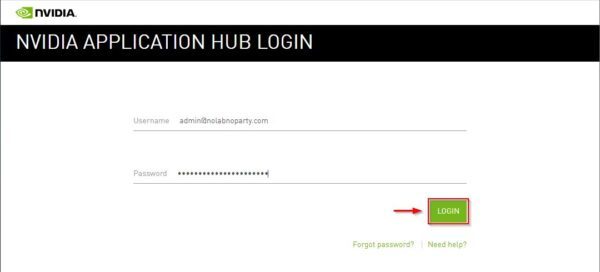
Login to the NVIDIA portal by entering your credentials then click Login.
Access the Software downloads section and click the Non-Driver downloads option. Select the NLS License Server for the platform in use (VMware vSphere in the example) and click Download.
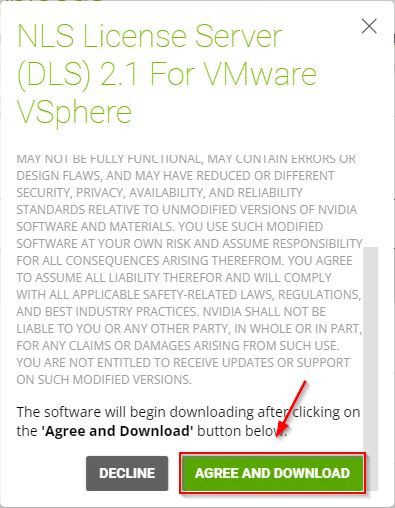
Click Agree and Download to download the appliance in your computer.
The NLS appliance has been downloaded.
Deploy the NLS appliance
Once the appliance has been downloaded, open the vSphere Client and right click the vSphere object level on which you want to deploy the NVIDIA license system.
Select Deploy OVF Template and click Upload Files. Select the NLS appliance downloaded from NVIDIA portal and click Next.
Enter the Virtual machine name and select the location for the VM. Click Next.
Select the appropriated compute resource and click Next.
Click Next.
Select the storage to install the appliance and click Next.
Select the appropriated VM Network and click Next.
Enter the network settings to configure for the appliance and click Next.
Click Finish to start the deployment.
Assign a static IP address
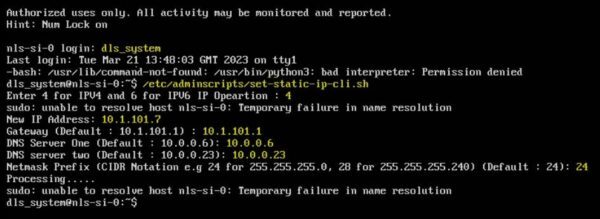
If the IP address is not automatically assigned to the appliance via DHCP or not configured, access the NLS appliance console and login as dls_system.
Type the following command to assign a static IP:
# /etc/adminscripts/set-static-ip-cli.sh
Enter the required network settings.
Create the admin user
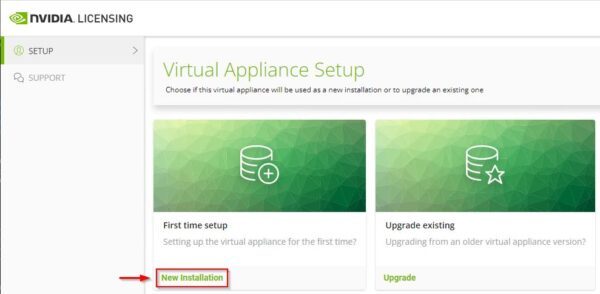
Once the IP address has been configured, open your preferred browser and enter the address https://<IP_NLS_appliance>. From the main dashboard, access the Setup area and click New Installation.
Enter the Username to use (dls_admin in the example) and the Password then click Register.
When the user has been registered successfully, click Continue to Login.
Enter the just created credentials and click Log In.
You are now logged to the NLS appliance.
Rename the Instance default name
If you want to customize the instance name, go to Service Instance section and select Action > Edit.
Enter a meaningful Name and a Description then click Edit Service Instance.
Download the DLS Instance Token
We need to download the token used to configure the service instance in the NVIDIA portal. The token file can be downloaded in two different way.
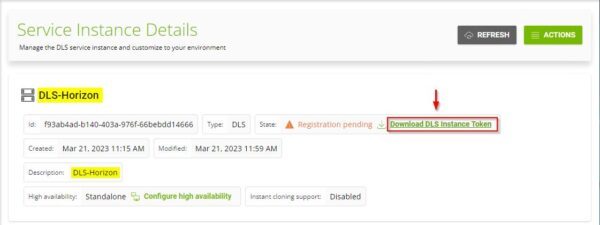
From the Service Instance Detail section by clicking the Download DLS Instance Token.
From the Dashboard section click Download DLS Instance Token and save it anywhere in your computer.
The token file just downloaded from the DLS appliance.
Upload the DLS Instance Token
Go back to NVIDIA portal and access the Service Instances area. Click Actions and select Register DLS instance.
Check New installation and click on Select Instance Token.
Select the previously saved token and click Open.
Click Upload Token.
The DLS token has been imported successfully.
Register the token
You need now to register the token to the portal. From Service Instances section click Actions and select Register.
Click Register.
The DLS appliance is now registered.
Create the License Server
Now go to the License Server > Create Server area and enter the Name for the server to create. Click Next Select features.
Select the license type and specify the number of licenses to use. Click Next Preview server creation.
Click Create Server.
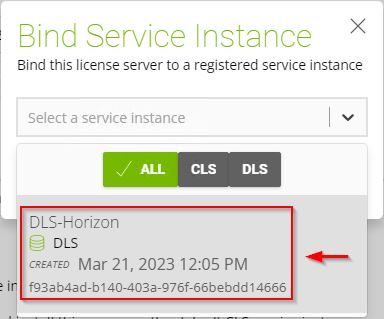
Click Actions and select Bind.
Select the previously created Server.
Click Bind.
The bind operation has been completed successfully.
Download the license file
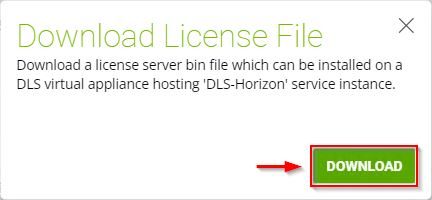
When the License Server has been created, you need to download the license file to install to the DLS appliance. Click Actions and select Download.
Click Download.
Save the license file anywhere in your computer.
Install the license server in the DLS appliance
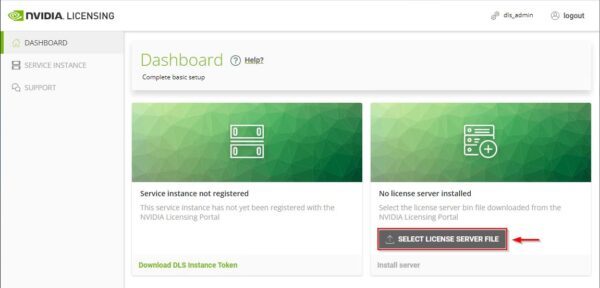
From the Dashboard of the DLS appliance, click Select License File Server File.
Select the previously downloaded license file and click Open.
Click Install Server.
The installation of the DLS appliance has been completed.
Configure DLS HA
To avoid service disruption in case the appliance fails, it is recommended to create the NVIDIA License System in HA configuration to eliminate the SPOF situation.
Following the above procedure, deploy another DLS appliance and assign a static IP address.
From the first DLS appliance, access the Service Instance area and click Configure high availability.
Switch the Enable high availability selector to ON.
Enter the Network location (FQDN) of the second DLS appliance and click Ping to check if the appliance is reachable. If the connection is successful, click Create Cluster.
The HA cluster is being configured.
After few seconds, the HA cluster configuration completes successfully. The High availability is now reported as Clustered.
Configure clients
To receive the license properly, the NVIDIA driver installed in the clients must know which server to contact. For this reason it's necessary to generate the client configuration token from the DLS appliance and install the token to the clients (VDI Golden Images or Workstations).
Generate client config token
From the DLS appliance, click Actions in the Service Instance Details section and select Generate client config token.
To download the token you must select the Scope reference first.
Access the Scope references tab and select the previously created server under Server Name. Click Download Client Configuration Token.
Save the file anywhere in the computer.
Install the config token in the client
Right click the just created token file and select Copy.
Paste the file to the client's folder C:\Program Files\NVIDIA Corporation\vGPU Licensing\ClientConfigToken.
Check the license assignment
Previously clients used the Port 7070 TCP to request licenses to the legacy vGPU License Manager. With the new DLS NVIDIA License System requirements have changed and the following ports between clients and the DLS Appliance must be open in your firewall:
- CLS instance - Ports 443 and 80
- DLS instance - Ports 443 and 80 (8081 and 8082 only between DLS HA Instances)
Check assigned license from the client
To check if the license has been assigned to the client, open the Command prompt from the client and navigate to folder C:\Windows\System32 and run the command:
C:\Windows\System32> nvidia-smi -q | more
The License Status is reported as Licensed. The client received the license from the DLS appliance.
The successful acquisition of the license is confirmed also by the message displayed in the bottom right of the screen.
Check assigned license from DLS appliance
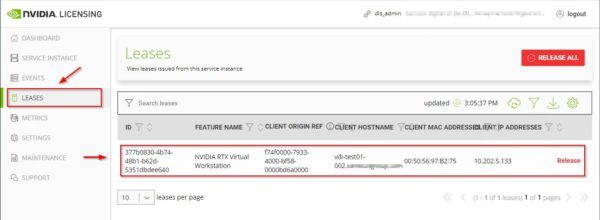
From the DLS appliance, access the Leases area and check the assigned licenses.
If you use NVIDIA products at your organization, DLS (or CLS) NVIDIA License System is the only supported method to assign licenses to clients. If a legacy vGPU License Manager is still in use, it's time to plan the migration to the new NVIDIA License System because the legacy Server is deprecated and EOL has been planned on 31st of July 2023.
















Thanks Paolo... This article is very helpfully for my work...
Thanks... glad you found the article useful.
Hi Paolo,
thanks for your blog.
I'd like to add that new CLS can be a good opportunity to get rid out the on-premise DLS vm - when possible.
Another 5 cents: I got some issues regarding the Ecc mode on nvidia-smi option: sometimes can be useful to disable or enable on all ESX servers to match the compatibility - https://docs.nvidia.com/grid/latest/grid-software-quick-start-guide/index.html