


In VMware vSphere you can migrate all vmdk virtual disks to a different datastore retaining Windows NTFS permissions in a very easy way.
If the current server belong to an AD domain, the migration of the stored data to a new server raises the problem of the applied NTFS permissions. How to retain all the settings?

Remove the disk to migrate
Before proceeding, ensure to have a full backup of the data in case of any corruption.
From the Windows Server to process open the Disk Manager, right click the disk to migrate and select Offline option.

The disk is then put in offline mode and no longer accessible from the Windows Server.

Open the vSphere Web Client, select the VM and go to Manage > Settings. In this example the Hard disk 2 has to be migrated. Click Edit button.

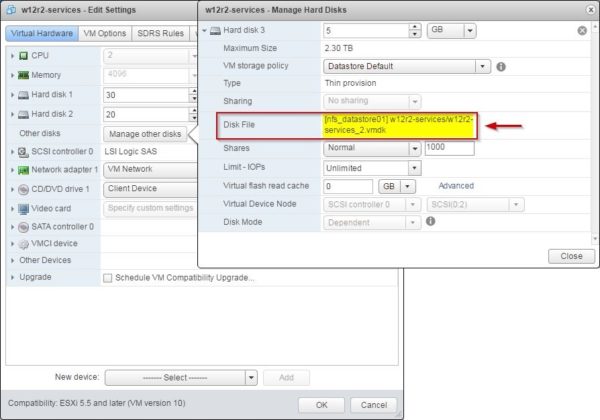
Expand the Hard disk 2 and click the X in the right side to remove the disk from the selected VM. Write down the Disk File name and the location.

Leave Device will be removed and Delete files from datastore options unchecked to keep all the stored data. Click the arrow in the right side to cancel the removal. Click OK to confirm.
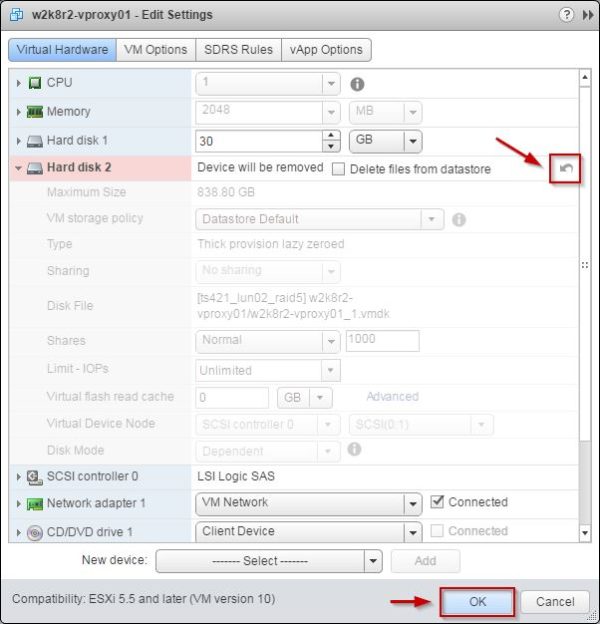
The Hard disk 2 has been removed from the VM hardware.

The vmdk disk to migrate is no longer attached to the VM but still resides in the VM's folder on its datastore.
Add the migrated disk to the new server
From the vSphere Web Client, select the new Windows Server and access the VM Hardware section.
Now we need to add the previously detached hard disk to the new server. From the New device drop down menu, select Existing Hard Disk item and click Add.

From the Select File window, locate and select the disk name to migrate from the old server location folder and click OK.

The New Hard disk is added in the new server. Click OK to confirm.

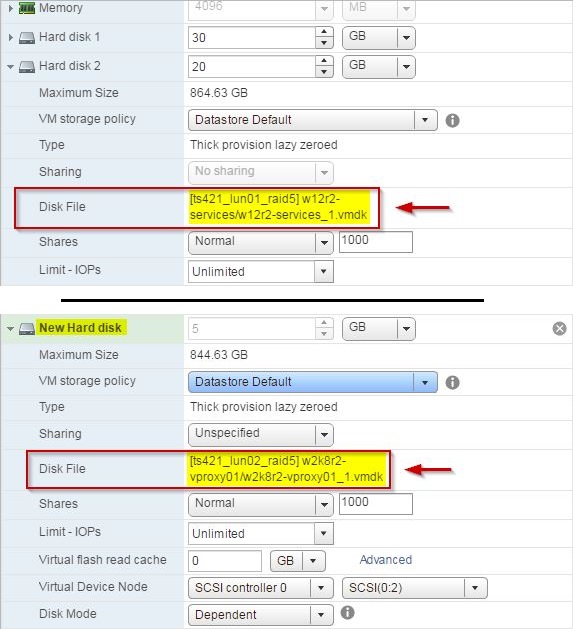
Expand the hard disks installed in the new VM. Note the new added disk kept the old VM name and it is still stored in the old location.
[ts421_lun01_raid5]w12r2-services/w12r2_services_1.vmdk
[ts421_lun02_raid5]w2k8r2-vproxy01/w2k8r2-vproxy01_1.vmdk
Access the Disk Management of the new Windows Server and run the scan disks task to detect the new attached disk. Right click the detected disk and select Online option.

The new disk is online and accessible from the new server.

Checking the NTFS permissions from the new Windows Server, all the NTFS permissions have been retained. Only the shares need to be recreated since the server name has changed.
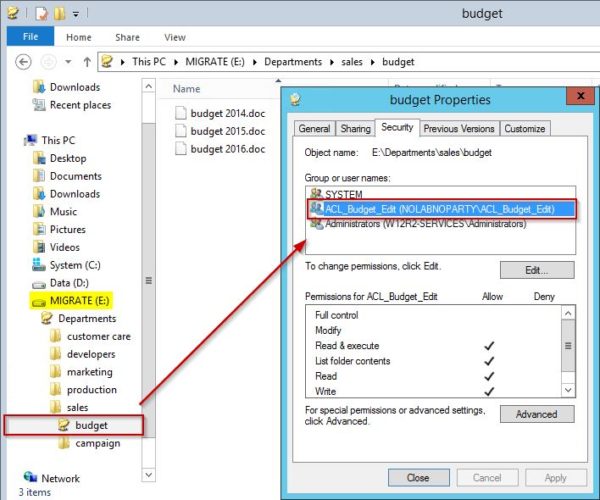
All stored data are available to users again in a transparent way. The administrators only need to configure the new disk map in AD to point to the shares of the new server.
Rename the vmdk
From the vSphere administration point of view, leaving the configuration like it is could be tricky to manage. You have the new server with a disk located in a different datastore with the vmdk that still holds the old server name.

The solution to this matter is called Storage vMotion. Storage vMotion is a feature of vSphere that allows to move VM and disks to a new location giving to existing disks and the new disk, from the old VM's datastore, the same name as the current VM.
From vSphere Web Client, right click the VM and select Migrate.

Select Change storage only option and click Next.

Select the destination storage and click Next.

Click Finish to proceed with storage migration. Keep in mind that Storage vMotion can move powered on VMs only if you have vSphere Enterprise Plus edition.
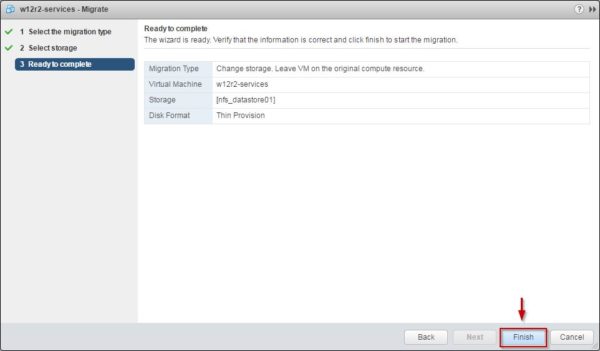
The VM is being relocated.

When the process has been completed, also the disk from the old location has been moved to the same location as the VM renaming the vmdk with the new VM's name.
If for storage performance reasons you need to migrate the VM and disks back to previous datastore, use Storage vMotion tool once again changing the destination storage.




Great article, I have really enjoyed your article. You show how to move a vmdk to a different VM retaining NTFS permissions. It is really helpful. Actually I was looking for the same answer but I was not able to find proper solution but now my all the doubts has been cleared in this article. I have done by the help of your article. The way you explained each and every step is really great. Thanks for sharing .
Thanks! Glad the post was useful...