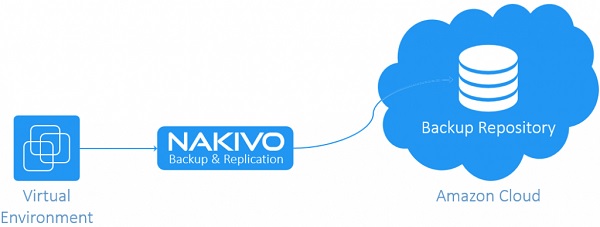
Nakivo Backup & Replication allows to store backups on Amazon S3 to ensure the protection and the integrity of the data in case of a disaster allowing to fulfill the 3-2-1 backup rule providing an offsite backup.
To store backups on Amazon, Nakivo requires a backup repository in Amazon S3 accessible via NFS.
Configure the AWS environment
To configure a NFS share in Amazon S3, the following AWS components must be configured to meet the requirements:
- AWS Gateway appliance
- S3 Bucket to store the backups
- File shares to enable the NFS access
Refer to this post to create and configure these components in AWS environment.
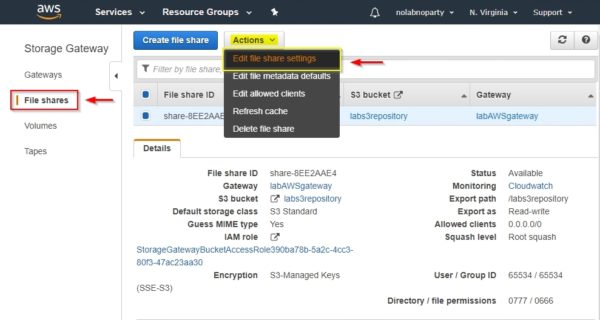
To access the NFS share in Amazon S3, Nakivo needs the Squash level set to All squashes. By default AWS creates this parameter set to Root squash and needs to be changed.
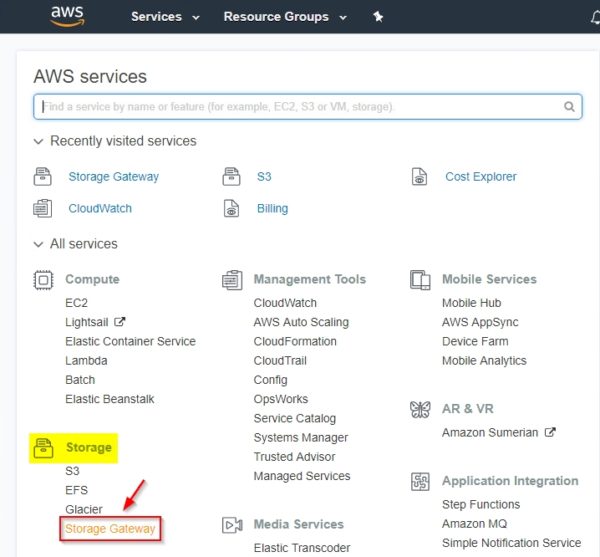
Login to AWS Management Console with your account and select Storage Gateway option under Storage area.
Access the File shares area and select the share to edit. Click Actions button and select Edit file share settings option.
From the drop-down menu, set the Squash level field as All squash then click Save.
When the configuration has been saved, double check Squash level is set to All squash.
Create an Amazon S3 repository in Nakivo
Login to Nakivo Backup & Replication by entering the correct credentials.
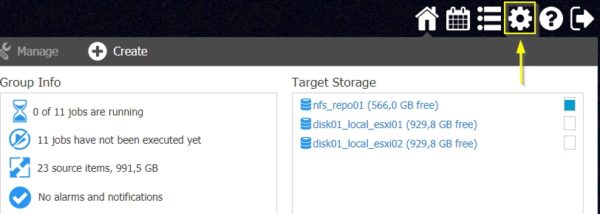
From the Dashboard click on Settings icon to access the software configuration.
Select Repositories from the menu.
Click Add Backup Repository and select Create new backup repository option.
Enter the requested parameters to connect the NFS share on AWS and click Create.
To access the NFS share on AWS, enter the path in the format:
IP_address_AWS_gateway:/aws_s3_nfs_share
The AWS S3 repository has been created successfully.
Storing backups on Amazon S3
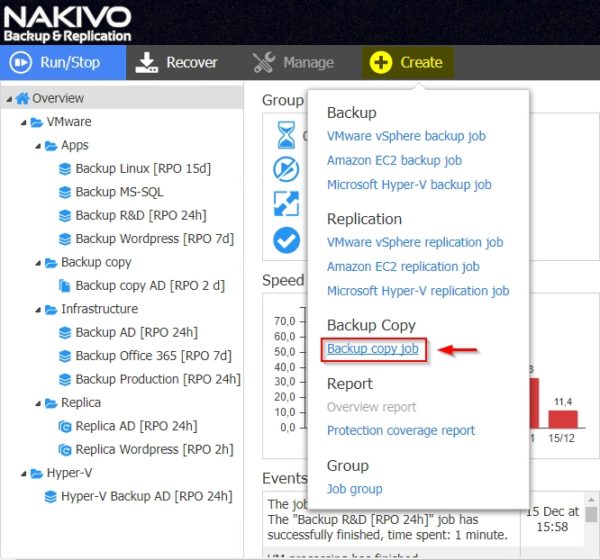
From the Dashboard click on Create menu and select Backup copy job option.
Select the VMs to copy to AWS and click Next.
From the Select Backup Repository drop-down menu select the created AWS repository and click Next.
Specify a Schedule then click Next.
Specify the desired Retention and click Next.
Enter a Job name and click Finish to save the configuration.
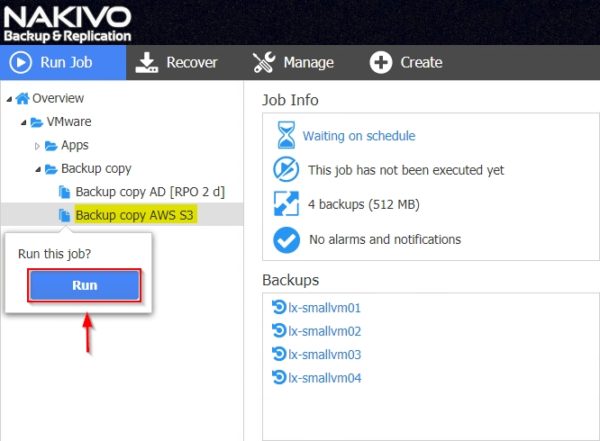
To run the backup copy immediately, right click the job and select Run Job.
Click Run to confirm.
The task is being executed.
The backup copy has completed successfully.
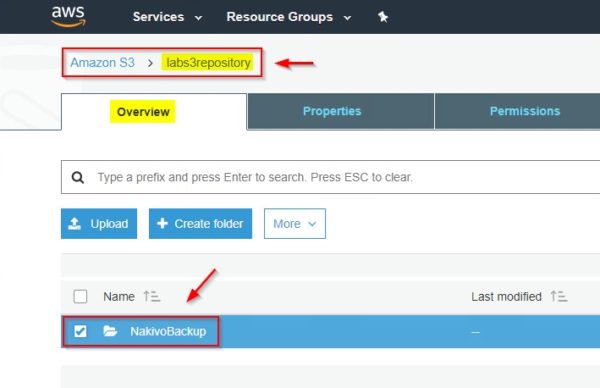
Checking the AWS S3 Bucket used as repository, you can notice the NakivoBackup folder has been created to store backups.
This solution allows you to copy VM backups offsite for disaster recovery purposes leaving local VM backups for fast recovery.


