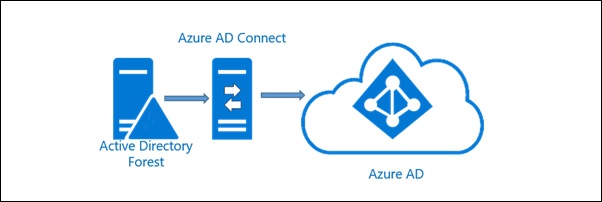
Azure AD connect is the solution used to connect the on-premises directory with Azure AD and it replaces the tools DirSync and Azure AD Sync now deprecated.
The synchronization tools offered for single forest (DirSync) and for multi-forest (Azure AD Sync) have been replaced by Azure AD Connect, the new solution that offers new functionality, feature enhancements and support for new scenarios. The old tools will reach end of support on April 13, 2017.
If you are running DirSync with a recent OS and less than 50.000 objects, the In-place upgrade is the procedure recommended for most customers. In other scenarios where the DirSync configuration is moved to a new server running Azure AD Connect, Parallel deployment should be used instead.
Prerequisites
On-premises servers and environment must meet the following prerequisites:
- If password synchronization feature is being used, the Azure AD Connect server must be on Windows Server 2008 R2 SP1 or later.
- .NET Framework 4.5.1 or later and Microsoft PowerShell 3.0 or later must be installed.
- The servers where AD FS or Web Application Proxy will be installed must be Windows Server 2012 R2 or later.
- An Azure subscription. With a paid Office 365 license you can also get into the Azure portal from the Office 365 portal.
In-place upgrade
If you have an existing DirSync server already running, an in-place upgrade is recommended.
Download from Microsoft website Azure AD Connect and run the installer. Accept the EULA then click Continue.
The system starts analyzing previously installed DirSync configuration.
Click Next to proceed with upgrade.
The process installs required components and the application.
Enter the Azure AD Admin password and click Next.
The entered credentials are being verified.
Enter now the AD Enterprise Administrator credentials for the current forest and click Next.
Enable Start the synchronization process when configuration completes option then click Upgrade button to proceed.
DirSync is uninstalled from the system keeping previous configuration.
Application is installed applying previous configuration.
When the upgrade process completes, click Exit to exit the wizard.
Login the Office 365 portal and under DirSync Status check the Last directory sync.
Change the configuration and advanced features
Run the Azure AD Connect from Desktop's icon to modify the configuration.
Details of the synchronization status and advanced configuration can be accessed running the miisclient.exe tool locatd in C:\Program Files\Microsoft Azure AD Sync\UIShell.
Force synchronization using PowerShell
The synchronization between on-premises directory and Azure AD can be forced using PowerShell commands.
Open Windows PowerShell and run the command:
PS: C:\> Import-Module adsync
Check the current sync schedule with the command:
PS: C:\> Get-ADSyncScheduler
To perform the synchronization you can use two commands:
- Full sync: Start-ADSyncSyncCycle -PolicyType Initial
- Delta sync: Start-ADSyncSyncCycle -PolicyType Delta
PS: C:\> Start-ADSyncSyncCycle -PolicyType Initial
Completed the upgrade procedure, the system is now able to synchronize the on-premises directory with Azure AD.


