StarWind Virtual SAN is a native VM storage solution hardware-less fully fault tolerant and high performing built for the virtualization workloads.
The storage is mirrored between the configured cluster nodes and treated just as local storage by both hypervisors and clustered applications.
Blog series
StarWind Virtual SAN installation - pt.1
StarWind Virtual SAN configuration - pt.2
StarWind Virtual SAN setup datastore - pt.3
Prerequisites
To deploy StarWind VSAN you need the following prerequisites:
- Windows 2012 R2 Server
- Starwind Virtual SAN software
- Two hosts VMware ESXi in cluster
Configure networking
StarWind VSAN requires a proper network configuration for its functionality. To provide a highly available storage solution all the infrastructure components have to be redundant avoiding single points of failure. In addition to clustered servers, make sure that also all switches used are redundant.

Setup VMKernel for iSCSI
From VMware vSphere Web Client, select the first host to configure and go to the Configure tab. Select Virtual Switches and click on Add Host Networking icon.
Select VMKernel Network Adapter option and click Next.
Create a New standard switch (recommended) or choose the Select an existing standard switch option to configure the iSCSI VMKernel and click Next. In the example an existing vSwitch0 is used.
Specify a Network label (i.e. StarWind_iSCSI_VMs) and click Next.
Specify the VMKernel IPv4 settings with a subnet not in use in the system.
Click Finish to save the configuration.
The VMKernel port has been created successfully.
Edit the properties of the vSwitch0 and make sure Jumbo Frames are enabled. Edit the VMKernel properties and set the NIC Settings > MTU to 9000 then click OK to confirm.
If the used vSwitch is configured with two or more NICs, iSCSI must bind only one active NIC. Select the iSCSI VMKernel and click on Edit settings icon.
Go to Teaming and Failover tab and enable Override option. Move the second NIC to Unused adapters and click OK to confirm.
Create Heartbeat channel
Now you have to create the Heartbeat channel used to avoid the split-brain situations when the HA cluster nodes are unable to synchronize, but continue to accept write commands from the initiators.
From the Configuration tab select Virtual Switches and click on Add Host Networking icon. Select Virtual Machine Port Group for a Standard Switch option and click Next.
Create a New standard switch (recommended) or choose the Select an existing standard switch option to setup the Port Group and click Next. In the example an existing vSwitch0 is used.
Specify a Network label (i.e. StarWind_VMs) and click Next.
Click Finish to save the configuration.
The StarWind_VMs' Port Group has been created successfully.
Edit the properties of the vSwitch0 and make sure Jumbo Frames are enabled with the MTU field set to 9000. Click OK to confirm.
Create Synchronization channel
Now you have to create the synchronization channel used to mirror every write operation addressing the HA storage.
Create a new vSwitch and define only one virtual machine Port Group for the Sync channel. From the Configuration tab select Virtual Switches and click on Add Host Networking icon.
Select Virtual Machine Port Group for a Standard Switch option and click Next.
Create a New standard switch (recommended) or choose the Select an existing standard switch option to setup the Port Group and click Next. In the example an existing vSwitch1 is used.
Specify a Network label (i.e. StarWind_Sync_VMs) and click Next.
Click Finish to save the configuration.
The Port Group has been created successfully.
Edit the vSwitch1 properties to make sure Jumbo Frames are enabled with the MTU field set to 9000. Click OK to confirm.
Repeat same procedure for the second ESXi node. When done, the second host will be configured with iSCSI and HeartBeat channels in vSwitch0.
While vSwitch1 will have the Sync channel configured.
Bind iSCSI port
Select the first ESXi host and go to Configure > Storage Adapters. Enable the iSCSI Software Adapter, select the configured adapter and in the Network Port Binding tab click the Add icon to bind the adapter with VMKernel Adapter.
Repeat same procedure for the second host.
Deploy StarWind Server
The VM on which StarWind will be deployed should have the following prerequisites:
- OS: Windows 2012 R2
- Memory: at least 8 Gb (plus size of RAM cache, which you are planning to use)
- CPUs: 4 virtual sockets, 1 core per socket
- HDD1: 100 Gb for OS
- HDD2: size you are planning to use as a shared storage
Each hard disk should be Thick Provisioned Eager Zeroed.
- NIC1: Management
- NIC2: iSCSI for VMs
- NIC3: Sync for VMs
All network adapters should be VMXNET3.
Add new disk and NIC to the server
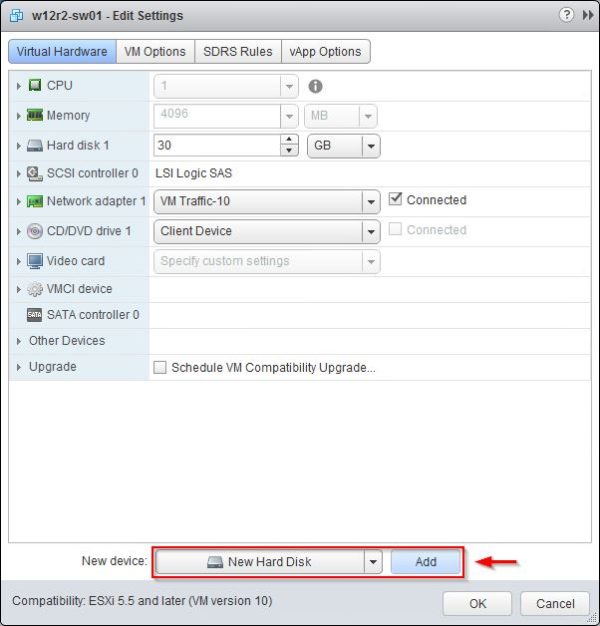
Once the deployment of the Windows Server has been completed, right click the VM and select Edit Settings.
In New device field select New Hard Disk item from the drop-down menu and click Add button.
Set the disk size and make sure Disk Provisioning is set to Thick Provisioned Eager Zeroed.
In New device field select Network item from the drop-down menu and click Add button twice in order to add the required NIC devices.
Assign the correct network to the Network adapters then click OK to save the configuration. Keep in mind that one NIC (in the example the adapter with network VM Traffic-10) will be used for iSCSI network.
Repeat same deployment procedure for the second StarWind Server.
Install StartWind software
Download the StarWind Virtual SAN for VMware vSphere and run the installer. Click Next to continue.
Accept the EULA and click Next.
Click Next to continue.
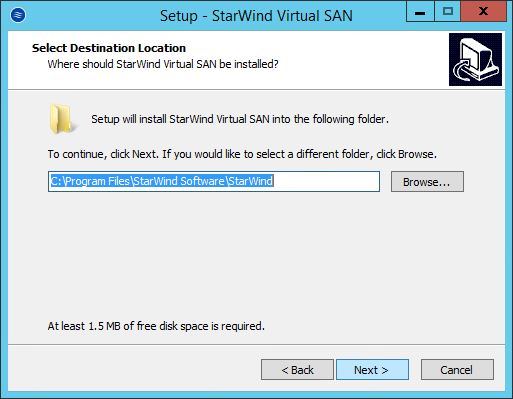
Leave default location and click Next.
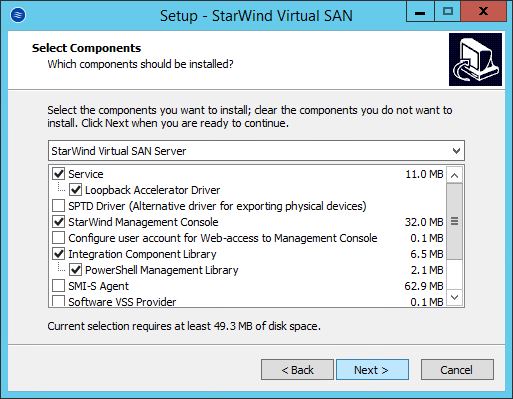
Specify components to install then click Next.
Click Next.
Enable Create a desktop icon option and click Next.
There are three Licence keys type you can use:
- Evaluation - 30-days fully working edition
- Free - fully working with some limitations
- Purchased
Select the license to use then click Next.
If you have already the license key, Browse the computer to select the key then click Next.
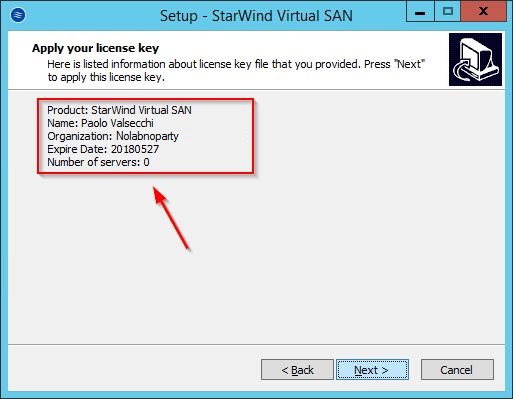
The purchased license details are displayed. Click Next.
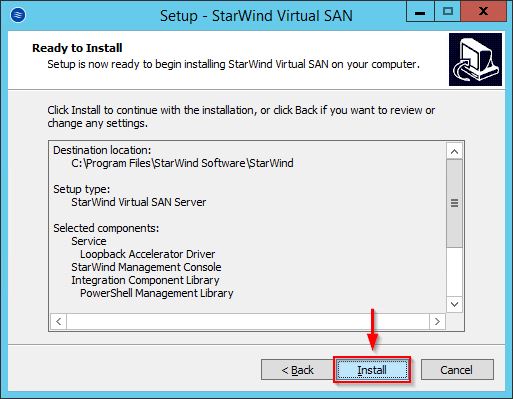
Click Install to proceed with installation.
StarWind Virtual SAN is being installed in the system.
When the installation has completed successfully, enable Launch StarWind Mangement Console option and click Finish to exit the wizard.
When you access the Management Console for the first time, you have to specify the default Storage pool. Click Choose path to specify the location.
Select the server's disk to use as shared storage and specify a directory. Click Open to confirm the location.
The installation of the software is now complete.
Part 2 will cover the configuration of the StarWind Virtual SAN devices and replication.


