
Webroot is a protection software solution that communicates with the cloud avoiding the hassle to manage the signature updates to deploy.
A lightweight client and a very quick installation are the main features you notice at first sight and compared to other solutions, systems performance are not affected, especially during a full scan.
How It Works
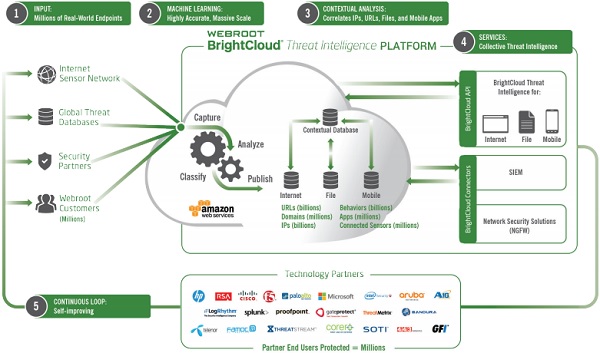
Instead of maintaining a local database that need to be kept up to date, Webroot client queries the cloud-based servers to determine if a program it sees is good or bad. If the program is OK, nothing happens but if it's a known threat, Webroot remove it from the system.
If an unknown program is installed in the computer, a detailed telemetry is sent to HQ for analysis and the program is monitored tracking every suspicious action for possible rollback. Can happen that a good unknown program might not be fully functional until the server notifies the antivirus after the analysis. If the program results to be bad, Webroot terminates the program and rolls back all of its actions.
If you lose Internet connectivity, Webroot can no longer contact its cloud server but since it already knows which installed programs are trusted you won't experience any issue. Programs never launched on your computer will be treated as unknown until the connection is restored.
If the system to protect doesn't have any Internet connection, probably Webroot isn't the solution for you.
Main features
- It can coexist with other solutions, no need to uninstall existing protection software.
- Endpoint is deployed and it is fully operational in seconds.
- No need to download or install signature updates or definition files.
- Lightweight client < 1 MB.
- Always up to date since the threat data is delivered to Webroot client from the cloud in real time.
- Online management with a single, intuitive, web-based management console.
Configuration
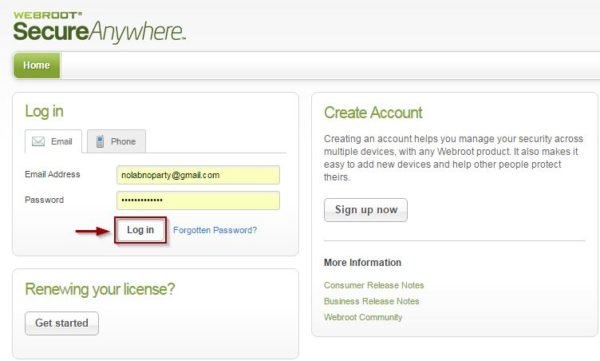
Prior deploying the clients, you need to configure the working environment. From your favorite browser type the address https://my.webrootanywhere.com, enter the credentials and click Log in to access the web console.
Policies
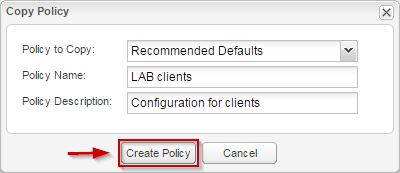
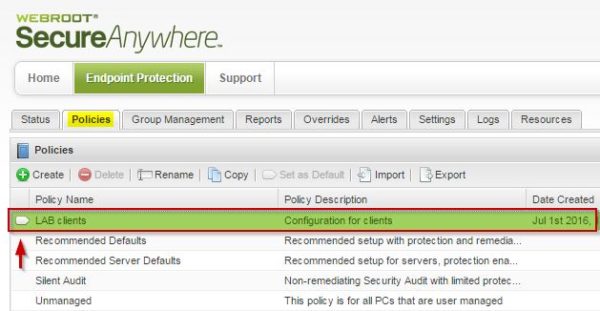
Access the Policies tab to setup the configuration to apply with Webroot. To create a custom profile, select one of the existing profiles and click Copy.
Enter a Policy name and a Description then click Create Policy button.
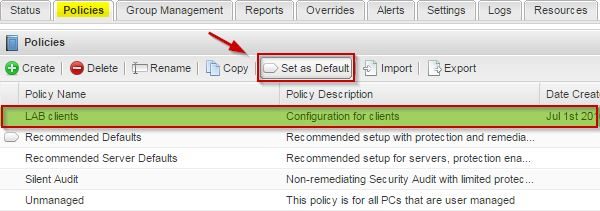
To use the new profile as default, highlight the created policy and click Set as Default.
Click Yes to confirm.
Selected policy is now the default configuration to use during installation.
Group Management
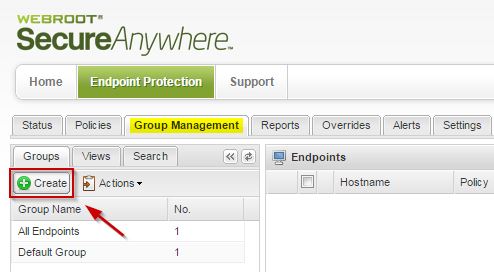
For a better management and control of the installations, you can group the clients defining some specific groups. In the Group Management tab, click Create button to create a new group.
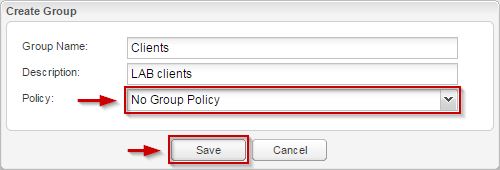
Enter a Group Name and specify a Policy to be assigned to this group. Click Save.
Click Actions to Edit, Delete or Deploy Endpoints to this group.
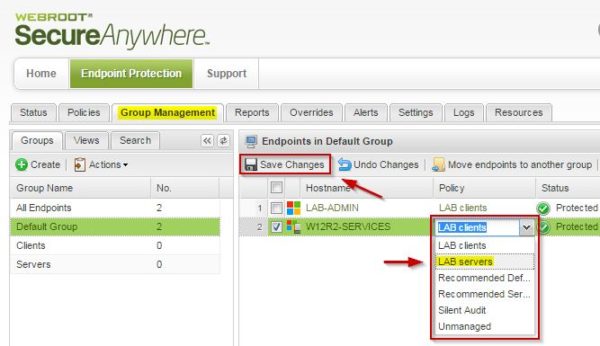
You can assign to the clients a specific configuration by selecting a Policy from the drop-down menu.
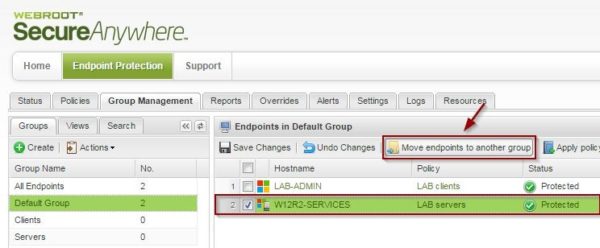
To assign the Hostname to a specific group, highlight the machine and click Move endpoints to another group.
Select the target group then click Yes to confirm.
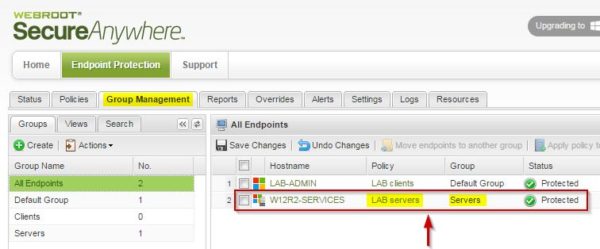
The new settings has been applied to the selected Hostname.
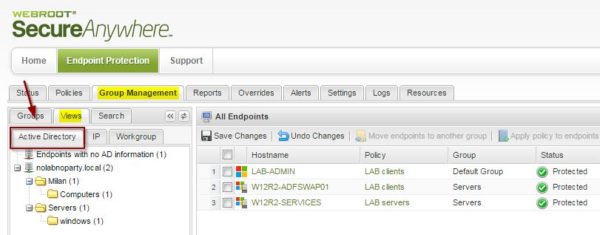
Selecting Views you can display the clients grouped by Active Directory, IP or Workgroup.
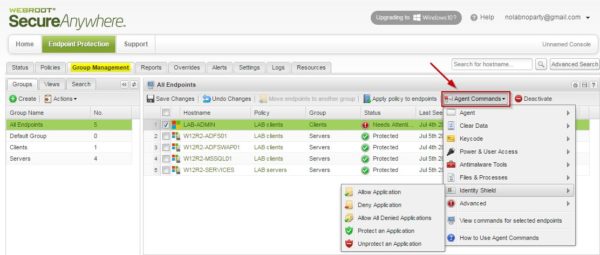
Through the Agent Commands button you can perform some actions to manage the environment.
Reports
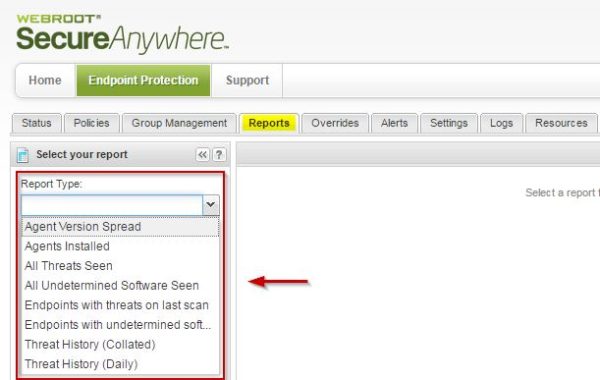
From the Reports tab you can select from the drop-down menu one of the available Report Type to get some statistics.
Overrides
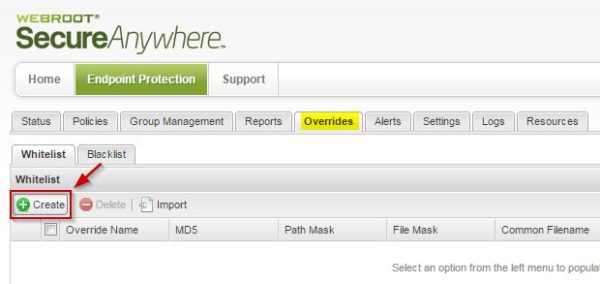
In the Overrides tab you can specify what to exclude from protection forcing Webroot to ignore a specific folder or file. Click Create to create an override.
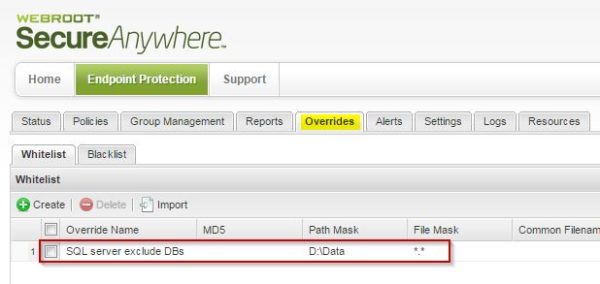
Give the override a Name and specify the directory/file to exclude from protection. You can also apply the override to a specif Policy. When done click Save.
The created override.
Alerts
To receive alerts, go to Alerts tab and click Create.
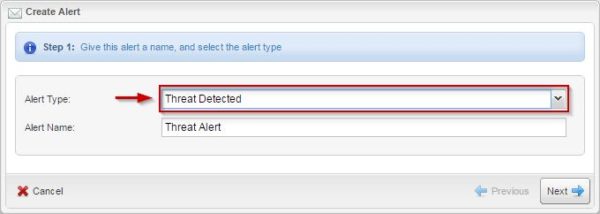
Select the Alert type and give it a Name then click Next.
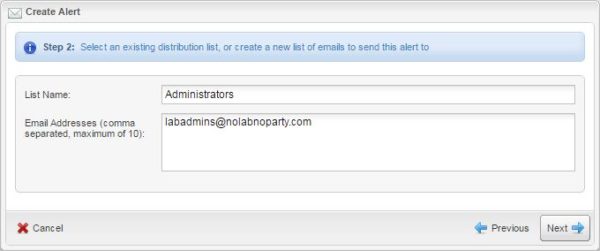
Enter a List Name and the target recipients then click Next.
Click Finish to save the Alert.
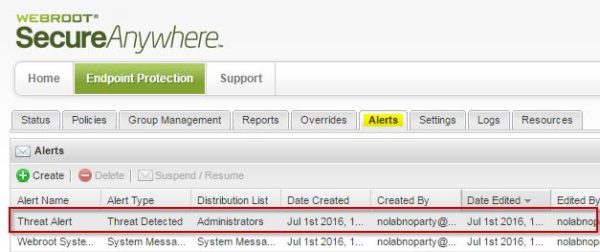
The created alert.
Logs
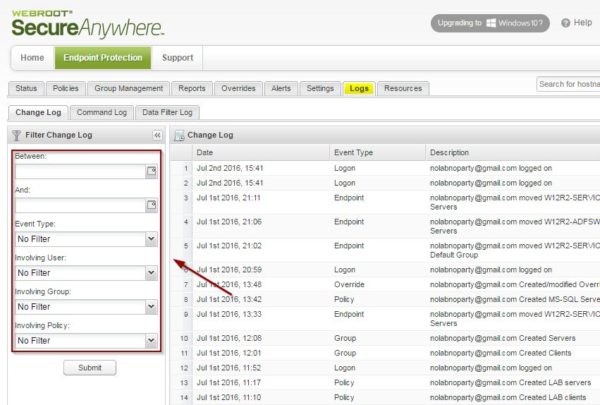
In the Logs tab all the actions performed within the system are tracked. Logs can be filtered selecting the available options in the left side.
Manually deploy Webroot
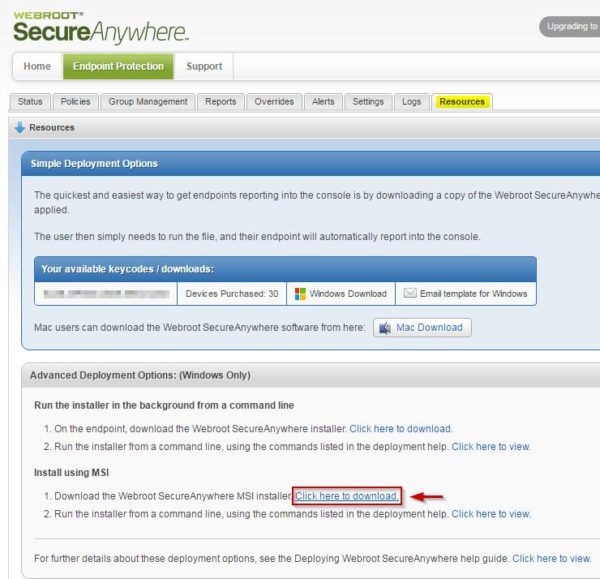
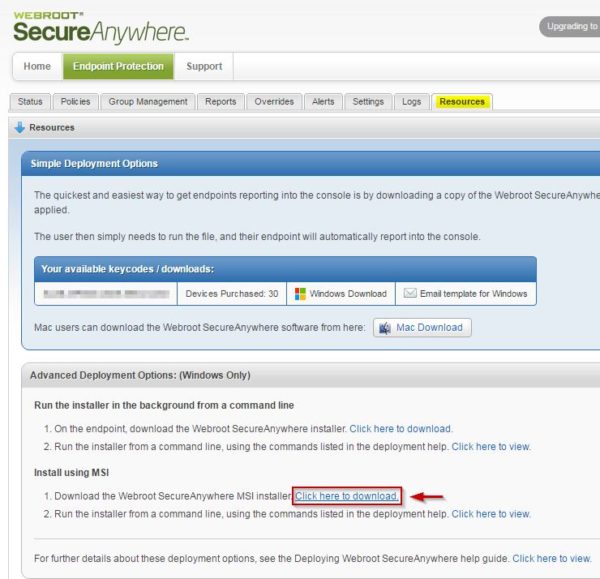
From Resources tab under Install using MSI item, click option Click here to download to retrieve the Webroot installer.
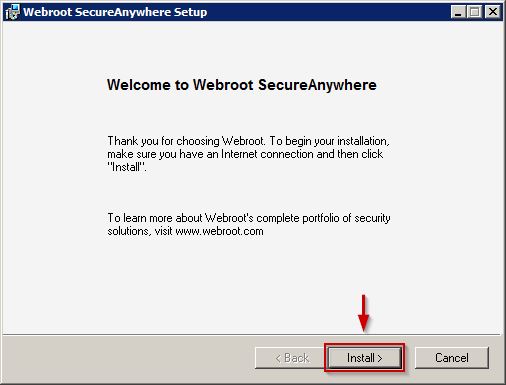
Run the installer and click Install to begin.
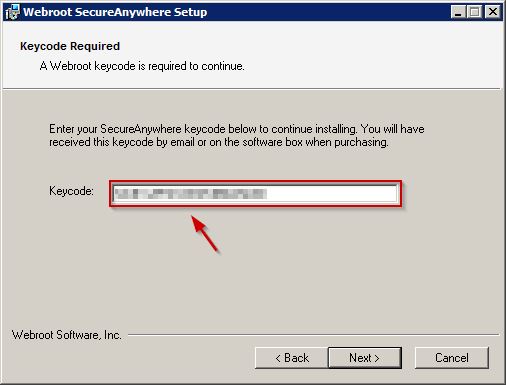
Enter the Keycode then click Next.
The client is being installed.
After few seconds, in the taskbar the Webroot icon appears. The installation has completed.
Deploy Webroot via GPO
Using your favorite browser, access the web console and select the Resources tab. Under Installing using MSI, download the .msi client to a network share.
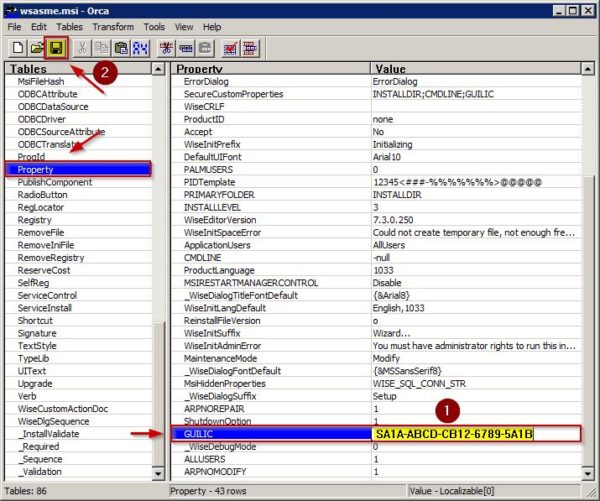
To deploy Webroot client via GPO with the correct purchased keycode, the code must be injected into the .msi file. To achieve that you need the Orca MSI Editor, a tool that allows you to open an MSI install file and edit the properties.
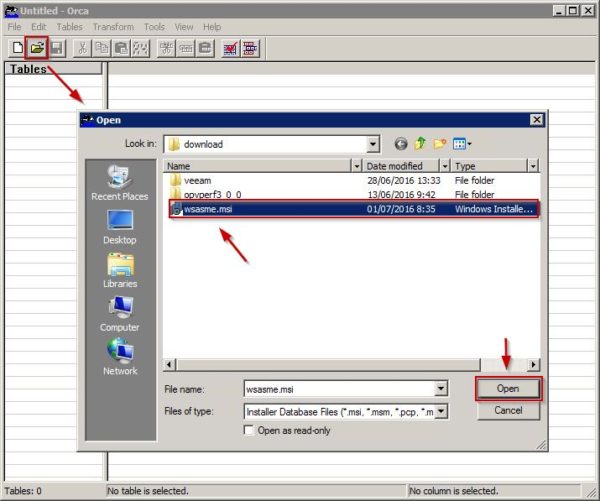
Run Orca editor and open the wsasme.msi file.
Scroll down the list and select Property > GUILIC and enter the purchased keycode. Save the file.
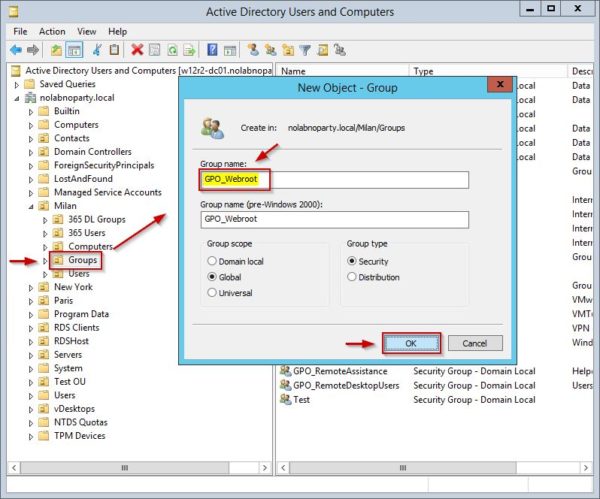
In the domain controller open Active Directory Users and Computers and create a group used for the deployment.
Assign the membership to computers on which you want to install Webroot then click OK.
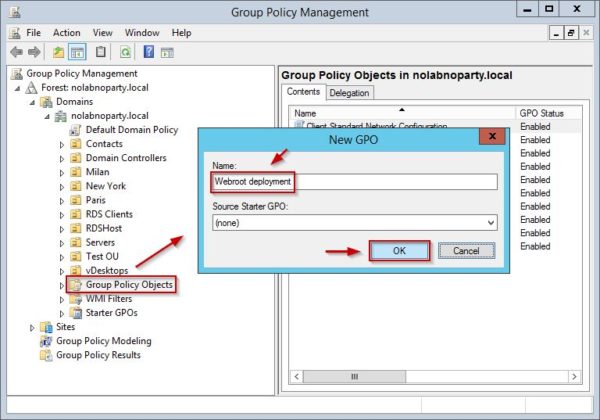
Open the GPO editor and create a new policy for the deployment group. Give the new GPO a Name then click OK.
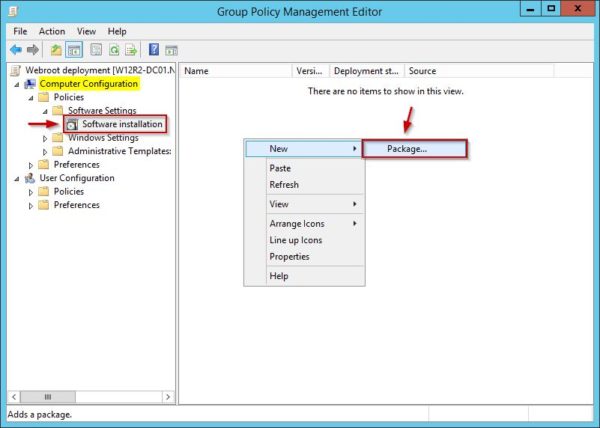
Go to Computer Configuration > Policies > Software Settings then right click Software installation. Select New > Package option.
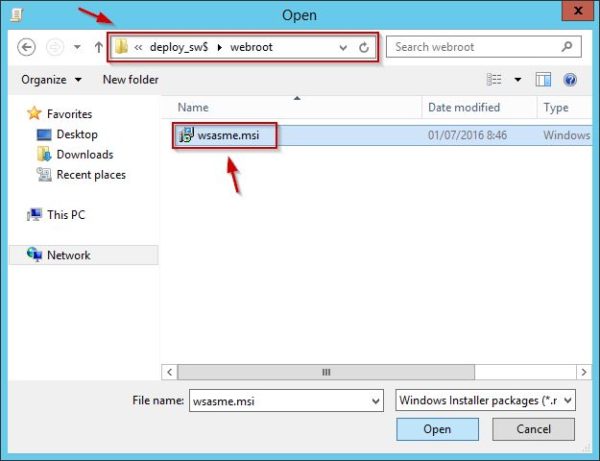
Select the .msi installer file previously downloaded from the Webroot console and click Open.
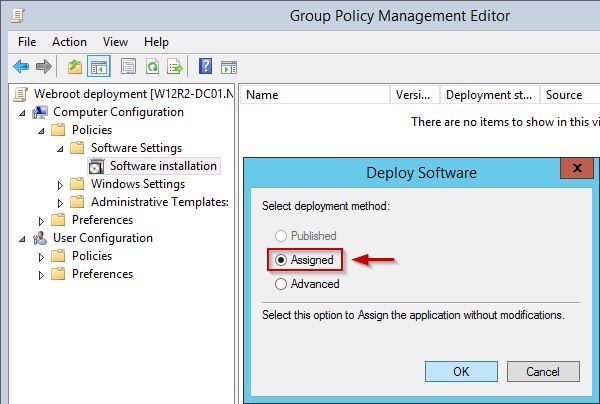
Select Assign as deployment method then click OK.
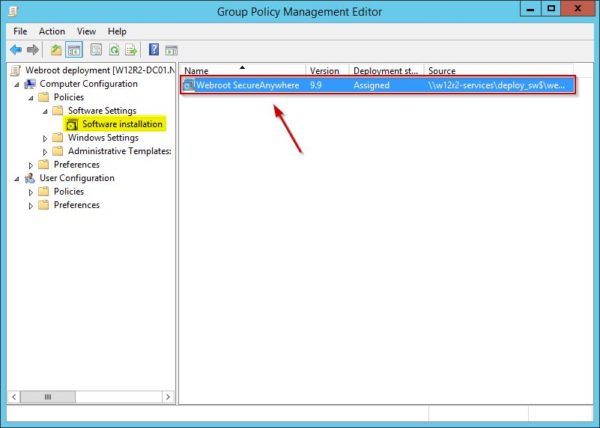
The Webroot package has been configured.
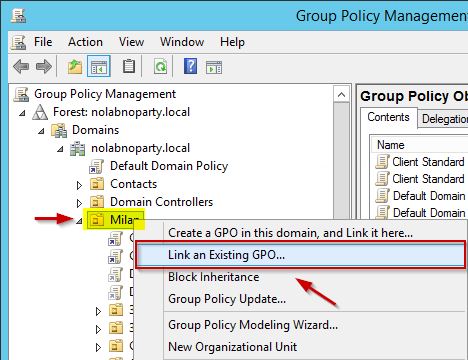
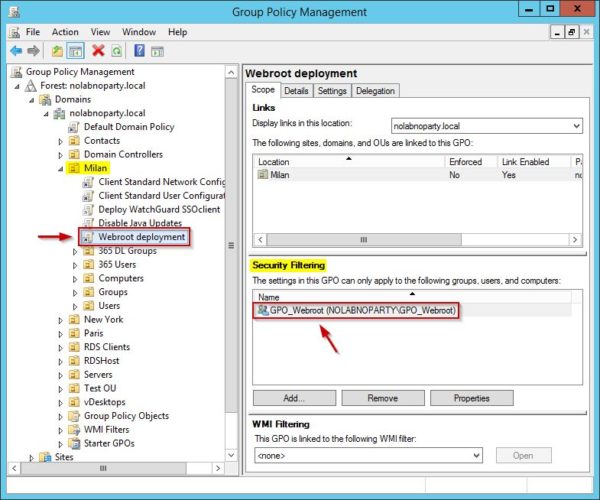
Now right click the desired OU to install the antivirus and select the Link an Existing GPO option.
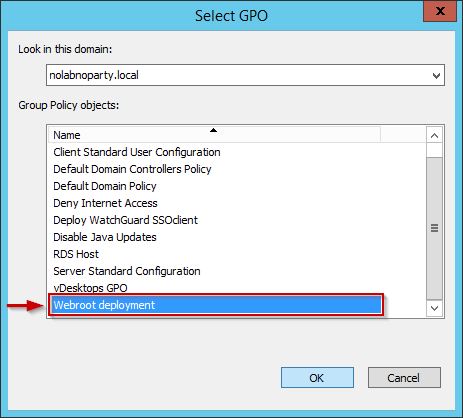
Select the GPO to link and click OK.
When the GPO is linked to the correct OU, under Security Filtering area enter the group name with the computers to install.
When a computer object member of the Webroot installation group is booted, the GPO is applied and the antivirus client is installed automatically. The installation really takes seconds and it is immediately fully operational. The green icon in the taskbar indicates the software has been installed successfully.
From the Webroot web console, select the Status tab to check the global status of the active installations.
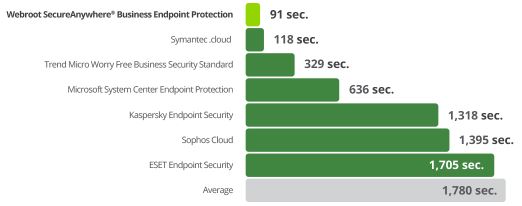
Comparison
The minimum installation time needed to be fully functional is only 5 seconds.
Average time taken to run a scheduled scan takes 91 seconds without impacting device performance.
A fast and easy deployment and the antimalware agent that can coexists with other antivirus software makes Webroot a product to consider as valid solution to protect your own business.















Thanks for sharing a nice post. Good Job. Keep it up Guys.
thanks for information and nice site
keep posting like this it’s really very good idea, you are awesome!