In VMware Horizon, the Instant Clone desktop shares a virtual disk of the parent VM consuming less storage than a full VM.
Compared to Linked Clones, the provisioning of Instant Clones is faster and they are created in a powered-on state when the user tries to login making the VM immediately available to be used.
Blog Series
VMware Horizon 7.12: installing Connection Server - pt.1
VMware Horizon 7.12: installing View Composer - pt.2
VMware Horizon 7.12: configuration - pt.3
VMware Horizon 7.12: Instant Clone setup - pt.4
VMware Horizon 7.12: Linked Clone setup - pt.5
VMware Horizon 7.12: connect to virtual desktop - pt.6
How Instant Clones work
Instant Clones shares virtual disks with the replica VM after the linked clone is created.
Instant Clones are provisioned by creating a running parent VM from the replica VM that shares the memory of the running parent VM from which it is created. While information come from the already existing running parent VM, changes are written to a delta disk, not to the running parent VM. Once created, the clone is linked to the replica VM and not to the running parent VM.
Since Instant Clone share the running parent VM's memory, they are created in seconds and instantly powered on and no boot time is required when the cloning process is finished. The Instant Clone is deleted when the user logs out.
Create the master image
To provision Instant Clone desktops, you need to create a Windows 10 (to take benefit of Blast protocol) virtual machine used as master image using a specific configuration:
1 - Set the Networking with the DHCP.

2 - Join the VM to the AD domain.
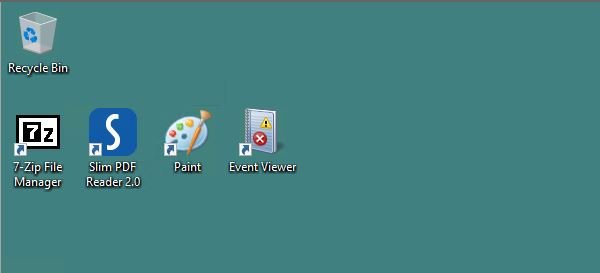
3 - Install the required applications.
Run the VMware OS Optimization Tool
To improve the performance of the VDI run the VMware OS Optimization Tool on VM. Select the OS in use and click Analyze.
Select the recommended optimizations reported by the analysis.
Click Optimize.
After few seconds the optimization process completes.
Install the Horizon Agent
Run the Horizon Agent.
Click Next to begin the installation.
Accept the EULA and click Next.
Select IPv4 as protocol to use then click Next.
Select VMware Horizon Instant Clone option and click Next.
Click Install to proceed with the installation.
The software is being installed.
When the installation has been completed, click Finish to exit the wizard.
Click Yes to reboot and complete the installation.
Take a master image snapshot
When the master image is complete, take a snapshot of the VM from vSphere Web Client.
Configure an Instant Clone pool
When the master image is ready, you can start configuring the appropriated pool. Instant Clones require a working Connection Server and the Horizon Enterprise edition to work.
Add an Instant Clone domain
Access the Settings > Instant Clone Domain Accounts area and click Add.
In the wizard, enter the credentials of an AD Domain Admin then click OK.
The added domain account.
Create an Instant Clone pool
Access the Inventory > Desktops area and click Add.
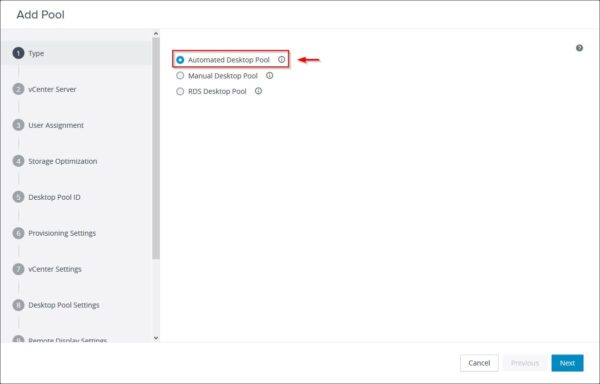
Select Automated Desktop Pool option and click Next.
Select Instant Clone option and the vCenter then click Next.
Select Floating as user assignment option. This option allows a user to logon to any desktop that is available within the desktop pool.
Specify the desired Storage Policy Management then click Next.
Provide an ID and a Display Name for the pool then click Next.
Specify the Virtual Machine Naming (for example ic-vdi-{n:fixed=2}) and the Max number of Machines to provision. The max number depends on the available resources in the vSphere cluster.
Specify the Provisioning Settings, such as Parent VM in vCenter, Snapshot, location, and Resource Settings. Click Next.
Specify the desired Desktop Pool Settings then click Next.
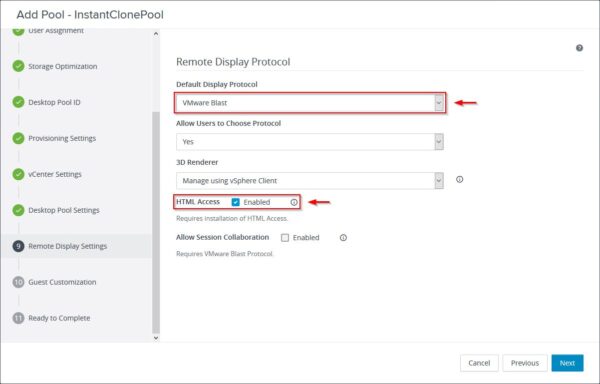
Specify the Remote Display Protocol to be used during the connection. Keep in mind VMware Blast is available only for Windows 10 Enterprise edition. Enable also the HTML Access option (requires the Blast protocol) to allow the access via browser. Click Next.
Specify the Domain and click Browse to select the AD Container to place the provisioned VDIs. Click Next.
Enable the Entitle Users After Adding Pool option to specify who can actually access provisioned virtual desktops by this pool then click Submit.
Entitle users
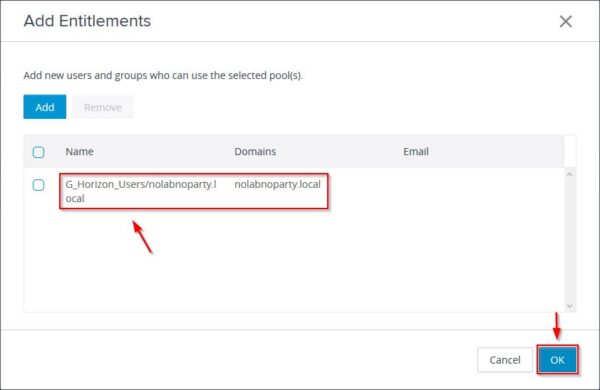
Click Add to specify users and groups that can use the selected pool.
Select the desired group or user and click OK.
Click OK to save the selection.
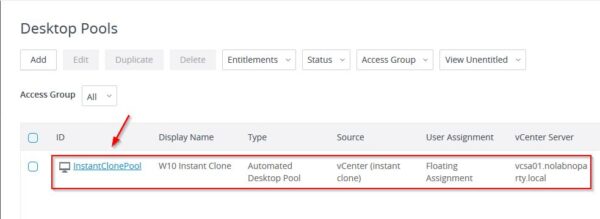
The created Instant Clone pool.
Provisioned VDIs can be found in the vCenter Server inside the folder specified during the pool configuration.
In Active Directory, VMs are placed in the OU specified during the configuration.
Part 5 will cover the creation of master image and the required configuration to provision Linked Clone desktops.


