
Installing a nested Proxmox in ESXi helps the administrators to test this solution in a VMware vSphere platform which is still the most used virtual environment.
After the acquisition of VMware by Broadcom and due to the uncertain future of the vSphere platform, many organizations began to look around to find a possible alternative.
Before starting the installation, download the latest version of the ISO installer from Proxmox website.
- Currently latest Proxmox VE ISO Installer version is 8.1-2.
Install a nested Proxmox in VMware
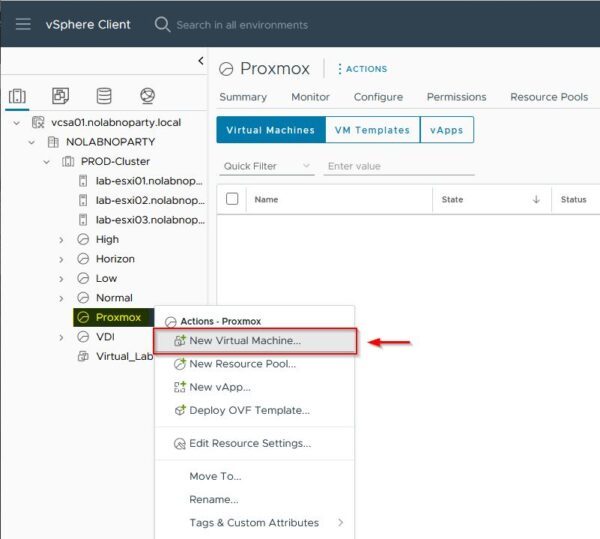
From the VMware Client, right click the vSphere object level to install Proxmox and select New Virtual Machine option.
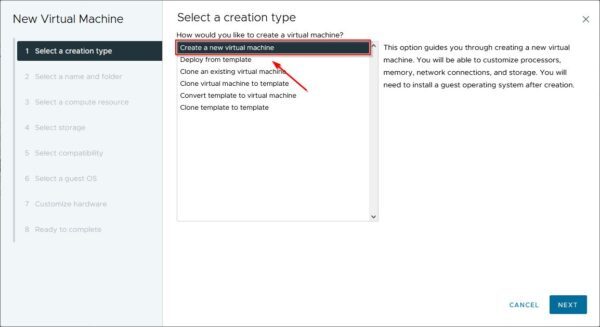
Select Create a new virtual machine then click Next.
Enter a Virtual machine name (pxmox01 in the example) and click Next.
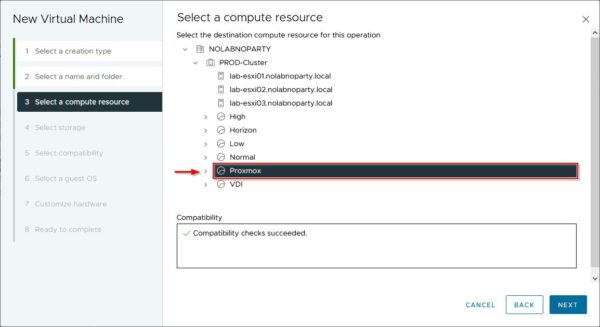
Select the destination compute resource then click Next.
Select the storage to use and click Next.
Select the host Compatibility and click Next.
Select Linux as Guest OS Family and Debian GNU/Linux 12 (64-bit) as Guest OS Version. Click Next to continue.
Proxmox requirements are the following:
- Intel EMT64 or AMD64 with Intel VT/AMD-V CPU flag.
- Memory, minimum 2 GB for OS and Proxmox VE services. Plus designated memory for guests.
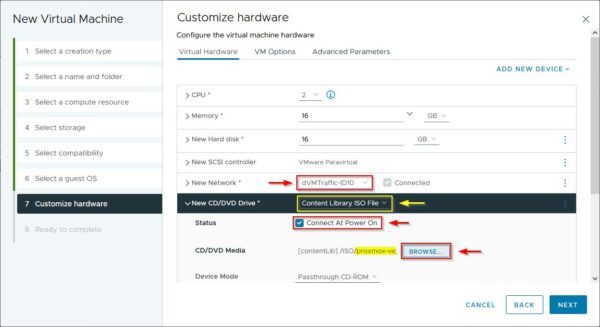
In the Virtual Hardware tab specify the desired resources to use for your environment.
For nested environments, in the CPU section you need to configure the Hardware virtualization accordingly by enabling the Expose hardware assisted virtualization to the guest OS option.
Specify the correct New Network to use and select in the New CD/DVD Drive the location of the Proxmox ISO to use (Content Library in the example) and enable option Connect At Power On. Click Browse to select a different path.
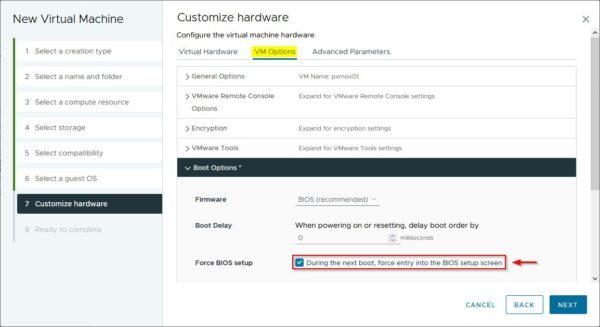
Go to VM Options tab, expand Boot Options and select During the next boot, force entry into the BIOS setup screen. Click Next.
Click Finish to create the VM.
Select the just created VM and click the Power On button.
Click Launch Web Console to set the boot options.
Go to Boot tab and set the CD-ROM Drive as first boot drive then press F10.
Click Yes to confirm.
From the console, select Install Proxmox VE (Graphical) and press Enter.
Click I agree to accept the EULA.
Leave default Target Harddisk and click Next.
Specify Country, Time Zone and Keyboard Layout then click Next.
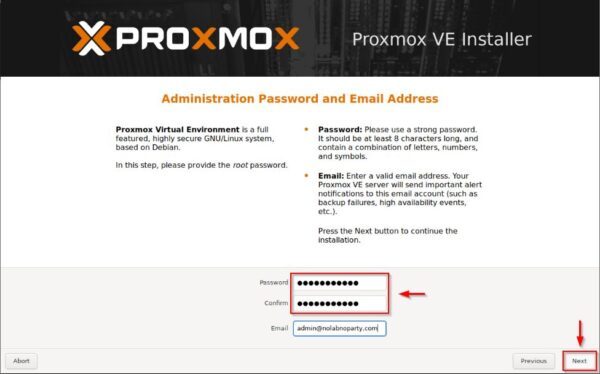
Set the Password and enter the Email then click Next.
Enter the Network Configuration and click Next.
Click Install.
Proxmox is being installed.
When the installation has been completed, click Reboot.
In the virtual machine settings, make sure to disconnect the Proxmox ISO installer from CD/DVD Drive 1 to boot the hypervisor properly.
Proxmox is now booting.
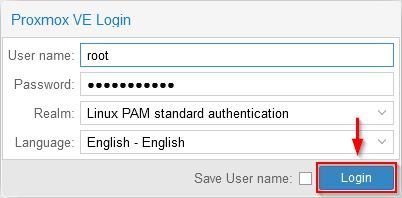
When the boot has been completed, using a supported browser connect the hypervisor by entering the address https://<IP_address>:8006. Enter the credentials set during the installation procedure and click Login.
The Proxmox hypervisor is now up and running.
Configure the VMware portgroup
Since we are using a nested Proxmox, to avoid network issues, the VMware Port Group where the hosts are connected should be configured as follows:
- Promiscuous mode - Accept
- MAC Address changes - Accept
- Forged transmit - Accept
Proxmox offers several cool features considering that is an open-source software and the weird situation VMware is currently facing is helping Proxmox to establish itself as one of the possible alternatives for virtual environments.











Great tutorial, I have been facing network issue for weeks I found your tutorial
Thank you