When the Veeam Hardened Repository ISO is installed, you need to configure the system to allow the connection from Veeam Backup & Replication.
The configuration is very simple and require only a few minutes to complete.
Blog series
Veeam Hardened Repository ISO installation - pt.1
Veeam Hardened Repository ISO configuration - pt.2
Veeam Hardened Repository ISO test backup - pt.3
Configure Veeam Hardened Repository ISO
When the installation of the Hardened Repository is complete, the system must be configured to allow access from the Veeam Server.
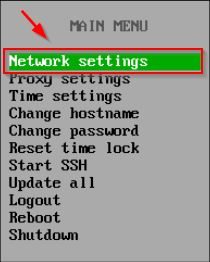
Select Network Settings to configure the network.
Select Advanced configuration.
Select Edit a connection.
Sotto la voce Ethernet, selezionare la NIC da configurare, quindi cliccare su Edit.
Configure or amend the network settings then click OK.
Select Set system hostname to specify the hostname.
Enter the Hostname and click OK.
Click OK to confirm.
Select Reset time lock.
If the repository is locked due to TimeShift, click OK to unlock.
Select Start SSH.
This section is crucial as it enables SSH access to the repository and provides the credentials required by Veeam VBR to connect to the Hardened Repository. Be sure to write down the Password, as it will be needed later during the Veeam configuration. Click Continue.
Select Update all to update the system (Rocky Linux).
When the updates are installed, click OK to exit the window.
The repository is now ready to be connected to the Veeam Server. Part 3 will cover the configuration of the Hardened Repository in Veeam and the testing of a Backup Job.


Hi Paolo, many thanks for the instructions. Is there actually a way to find out in advance how many daily backups can be stored on the hardenend repo with the currently installed storage space? best regards chris
Hard to say... it depends on the backup retention configured, the size of data to backup and the amount of daily data change. You can use this tool to get an estimate of the consumed space: https://www.veeam.com/calculators/simple/vbr.