VMTurbo Operations Manager is a software solution to manage the virtual infrastructure improving performance and maximizing the utilization.
Operations Manager analyzes the real time performance, resource capacity and system constraints across the virtual infrastructure to implement and adjust resource configurations and workload placements.
Blog Series
VMTurbo Operations Manager deployment - part 1
VMTurbo Operations Manager configuration - part 2
Deploy Operations Manager
From VMTurbo website download the appliance for vSphere.
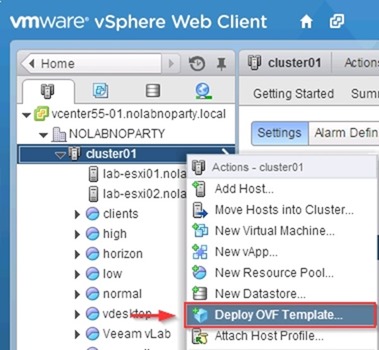
To deploy the Operations Manager in a vSphere cluster, from vCenter Server right click the cluster and select Deploy OVF Template item.
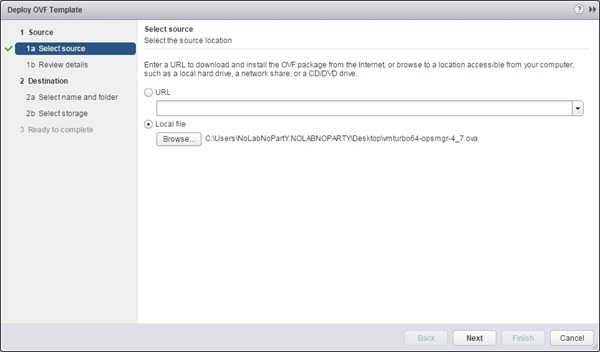
Browse your computer and select the downloaded .ova file. Click Next.
Enable Accept extra configuration options and click Next to continue.
Click Accept to accept the EULA.
Assign a Name to the VM then click Next.
Select the preferred virtual disk format then click Next.
Set the Destination network then click Next.
Click Finish to deploy the appliance.
vCenter privileges for Operations Manager access
The account used by Operations Manager to access vCenter must have sufficient privileges to access environment data and to perform recommended actions.
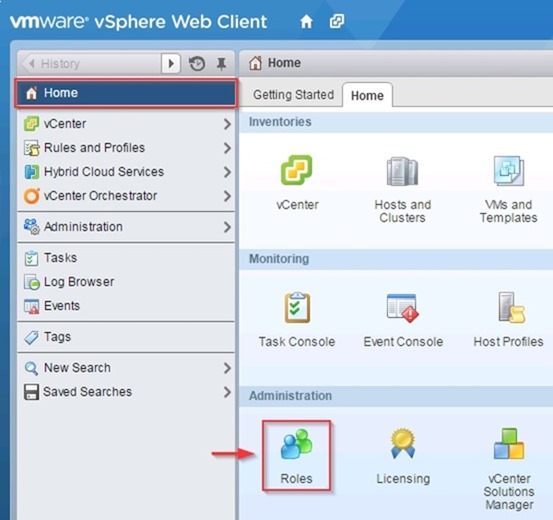
Open vSphere Web Client and go to Home and select Roles under Administration.
Right click Read-only role and select Clone.
Assign a Role name and check the permissions as listed in the table above. Click OK when done.
In the Hosts and Clusters view, go to Manage > Permissions and assign the new role to the VMTurbo service account.
Permissions granted to VMTurbo account.
Configure basic settings
Form vSphere Web Client, power on the virtual appliance just installed.
When the boot is complete, access the console.
Set the IP address
To change the appliance IP address access the appliance console and login using ipsetup/ipsetup for username and password.
The Network Setup screen opens with default configuration (DHCP).
Set the correct parameters then click OK.
The new configuration is being applied.
Configure the time zone
From the console, enter root with default password vmturbo and type the following command:
# yast timezone
Set your time zone then click OK to save settings.
Setup NTP for time sync
To setup NTP on VMTurbo to keep the time in sync, edit the /etc/ntp.conf file and modify the last two lines accordingly.
# vi /etc/ntp.conf
Change the default server names to the FQDN of your time servers.
Reboot the server.
# reboot
The Operations Manager deployment is complete. Next step is the configuration of the environment to tune VMTurbo for the virtual infrastructure in use.


