Latest Nakivo Backup & Replication v10.7 provides the capability to directly backup to Azure Blob Storage supporting the granular restore and the Immutability for an extra layer of security for your backup data.
AWS S3, Wasabi, and BlackBlaze platforms were already supported in previous Nakivo versions and now with the addition of Azure Blob Storage, the most common and popular cloud object storage solutions are now supported.
Configure the Azure environment
To configure the backup to Azure Blob Storage, you need to configure all the resources required in the Azure Blob Storage structure.
Create the Azure application
First step to do is the creation of a new Azure application.
Login to your Azure portal and click Azure Active Directory to create the Azure application.
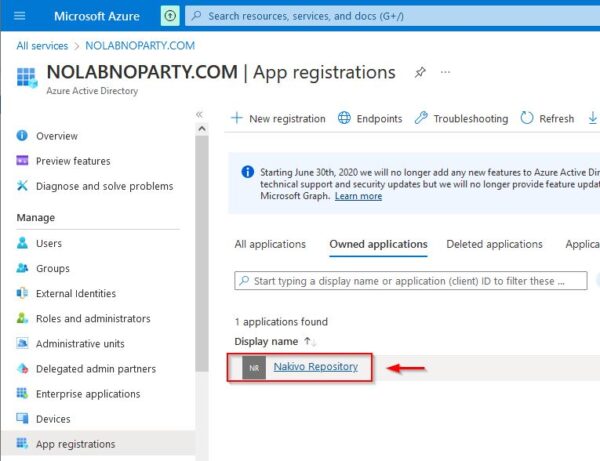
Access the App registrations section and click New registration.
Specify the Name for the application then click Register.
The new application has been created.
Create the Storage account
From the Azure portal, select Storage accounts service to access the configuration area.
If no Storage accounts are available, click Create to create a new one.
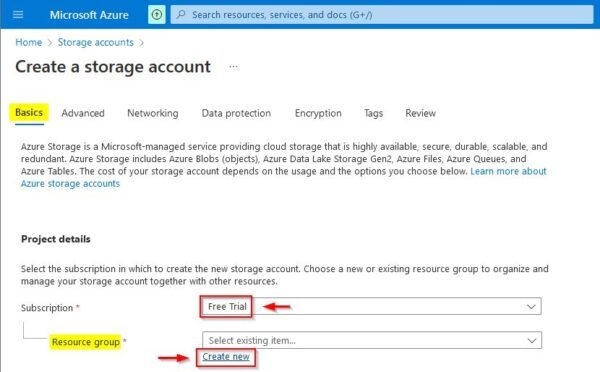
Specify both Azure Subscription and Resource group to use. If no existing resource groups are available, click the Create new link.
Enter the new group Name then click OK.
Under Instance details, specify Storage account name, Region and Performance. As Redundancy type the Geo-redundant storage (GRS) is the recommended option for backup purposes (in the example the cheaper Locally-redundant storage (LRS) option is used). Click Next.
In the Advanced area, select Cool as Access tier because is specific for backup scenarios. Click Next.
In Networking area, leave default values and click Next.
In Data Protection leave default settings. If you want to make your backups immutable, thick both Enable versioning for blobs and Enable version-level immutability support options. Click Next.
In Encryption you can configure the encryption settings for your data. Click Next.
If requested, specify Tags to use then click Next.
Click Create to create the configured storage account.
The storage account is being created.
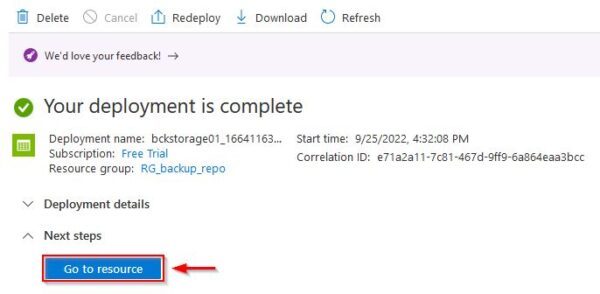
After few seconds, the resource has been created successfully. Click Go to resource for details.
The created storage account.
Assign role
Once the storage account has been created, you need to assign the correct role to the application previously created.
Access the Access Control (IAM) area and select Add > Add role assignement.
In the Role tab, enter storage blob in the search bar to filter the available roles then select Storage Blob Data Owner role. Click Next.
In Members tab, select User, group, or service principal option for the Assign access to field then click on Select members link to assign the role to the desired application.
Enter nakivo in the Select bar and select the corresponding application previously created. Click Apply.
The application Nakivo Repository has been assigned to the selected role. Click Next.
Skip the Conditions tab and go to Review + assign. Click Review + assign.
Create a Container
From the selected storage account, enter blob in the search bar to filter available options. Select Containers and click Container to create the new resource.
Enter the Name for the new container and click Create.
The created Container.
Azure credentials
From Azure Active Directory, access the App registrations section and click on the application created at the beginning (Nakivo Repository in the example).
Write down both Application (client) ID and Directory (tenant) ID required to configure the Blob in Nakivo.
Access the Certificates & secrets section and click New client secret.
Enter a Description and specify the Expires. Click Add.
Write down the just created Value that will be used in Nakivo later.
Configure the backup to Azure Blob Storage in Nakivo
Login to Nakivo Backup & Replication v10.7 with the correct credentials.
Add Azure account to the Inventory
From the Nakivo main dashboard, go to Settings area and access the Inventory section. Click Add New to add the Azure Blob to the Inventory.
Select Cloud and click Next.
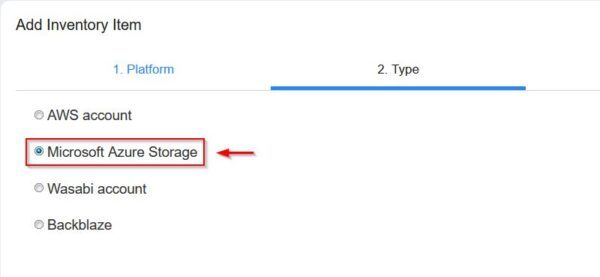
Select Microsoft Azure Storage and click Next.
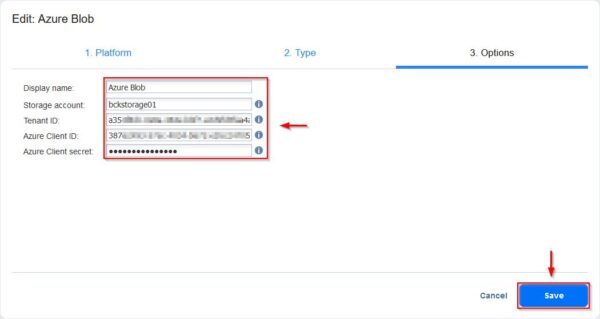
Enter a Display name for the new object then enter the values previously noted from Azure:
- Storage account - enter the name of the created storage account
- Tenant ID - enter the Directory (tenant) ID
- Azure Client ID - enter the Application (client) ID
- Azure Client secret - enter the Value created in the Client secret step
Click Save when done.
The new object has been added to the Inventory.
Create the new Repository
Now access the Repositories area and select Add Backup Repository > Create new backup repository.
Select Cloud and click Next.
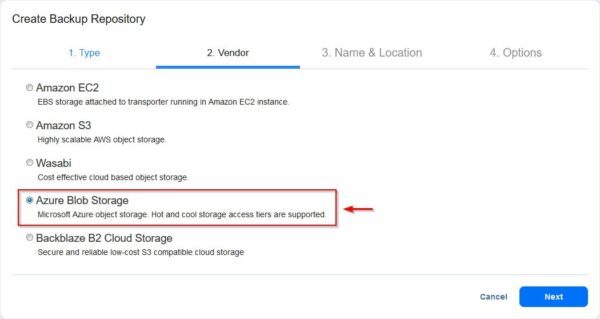
Select Azure Blob Storage and click Next.
Specify Name, Assigned transporter, Account and Container. Click Next.
Click Finish to complete the repository creation.
The new repository has been created successfully.
Configure the Nakivo backup job
The backup to Azure Blob Storage feature supports both Backup and Backup Copy jobs adding flexibility to your backup strategy.
From the main dashboard click Create and select VMware vSphere backup job.
Select the VMs to backup and click Next.
Select the just created Azure Blob repository and click Next.
Specify the desired Schedule and click Next.
Specify the desired Retention and click Next.
Enter the Job name and click Finish to save the Backup Job configuration.
Test the backup to Azure Blob Storage
Run the created Backup Job to test if everything works as expected.
Depending on the amount of data to transfer, after some minutes the backup completes successfully.
Checking the content of the used Container in Azure (backup in the example), you can notice the stored backup data.
The backup to Azure Blob Storage feature extends the support for object storage solutions and allows to store and keep backups also for long retention in the Azure cloud with an affordable price.
Nakivo Backup & Replication v10.7 is available to download as 30-day trial.


