When using Omnissa Horizon, the copy and paste operation between the local device and Published Applications may not work.
By default, this feature is disabled for security reasons. A straightforward way to enable this is by using Dynamic Environment Management (DEM), a tool included with the Horizon solution.
Default behavior
Login to the VDI environment with an entitled user. Enter username and password then click Login.

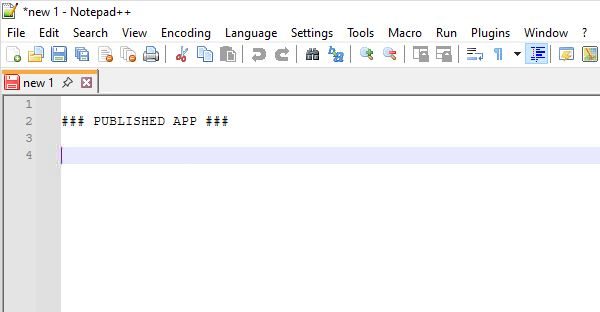
Open a Published App (Notepad++ in the example).

The application opens and the user can begin writing.
From Client to Published App
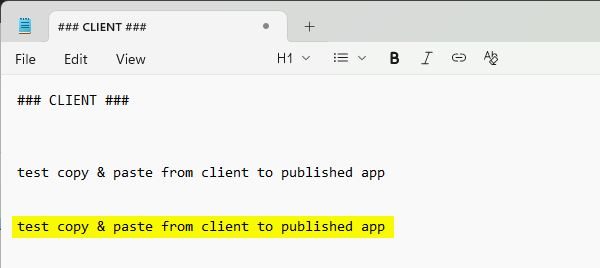
On your local device, open an application like Notepad and type a test sentence, for example "test copy & paste from client to published app". Highlight the sentence, right click and click Copy.

In the Horizon Published App, right-click to paste. The Paste option will be grayed out. This is because copy and paste from the client to Published Apps is disabled by default.

From Published App to Client
In the Published App, write a sentence like "test copy & paste from published app to client". Right-click and select Copy.

Go to your local application (e.g., Notepad), right-click, and select Paste.

The pasted text will be the same as what was previously copied from the client, "test copy & paste from client to published app". This is expected behavior, as copy and paste is disabled in both directions by default.
Enable copy and paste feature
The copy and paste capability for Published Apps can be enabled using the Dynamic Environment Management (DEM) tool within the Omnissa Horizon solution.
Install the DEM Agent
The DEM Agent must be installed on the RDS Hosts configured in the Horizon Farm.

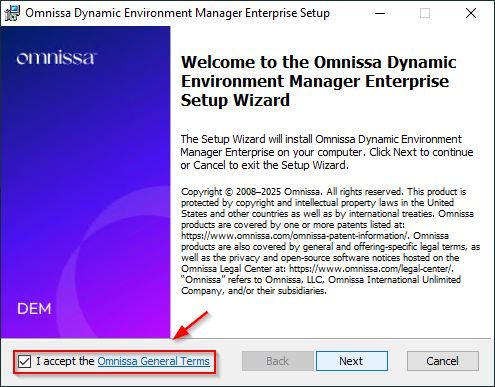
Access the RDS Host and install the DEM Agent by double clicking the installation file. Accept the EULA and click Next.
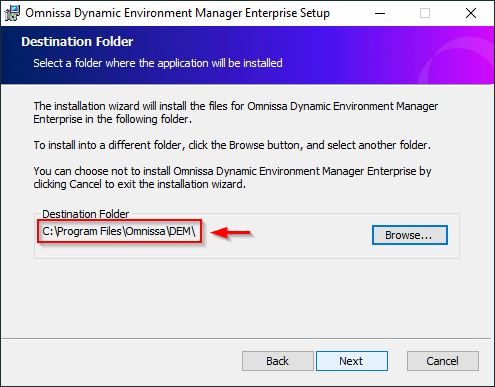
Keep the Default Folder and click Next.
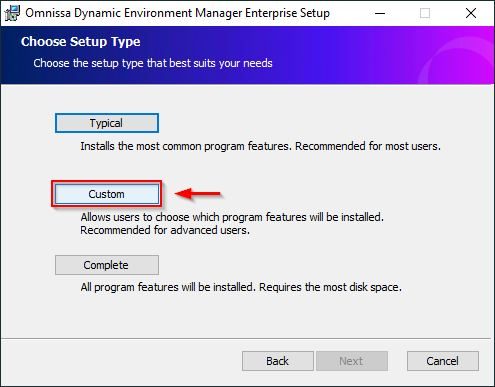
Select the Custom installation option.
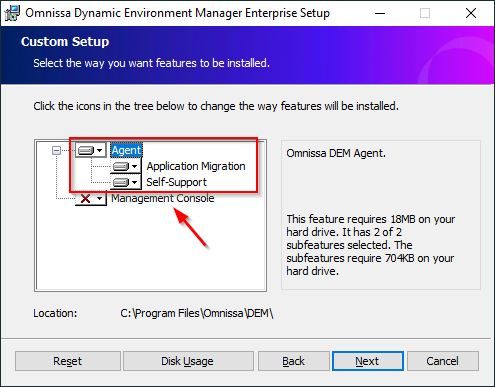
Ensure the Agent feature is selected and click Next.
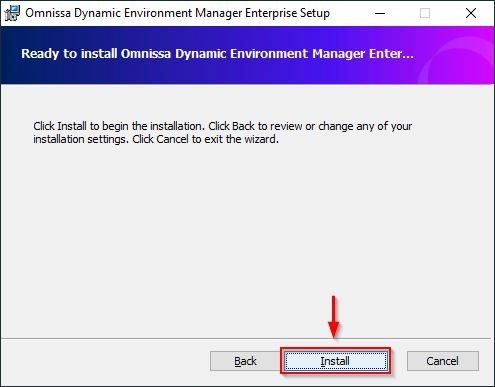
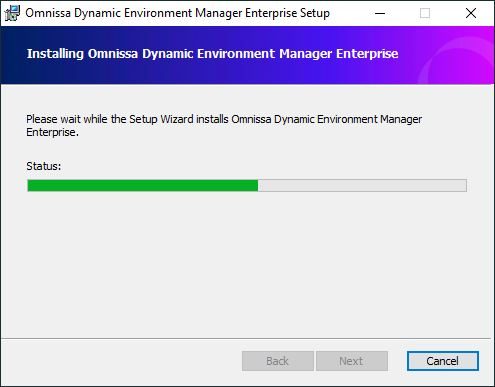
Click Install to begin the installation.
The Agent is being installed.
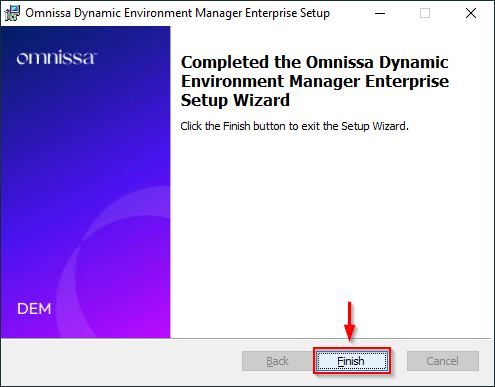
Once complete, click Finish to exit the wizard.
Apply the DEM GPO
For DEM to work with Published Apps, its GPO must be applied to the RDS Hosts.
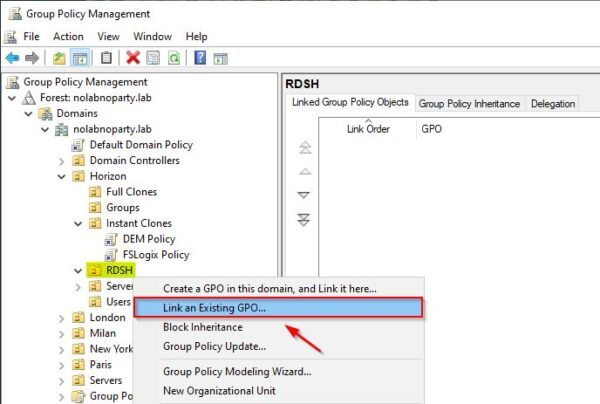
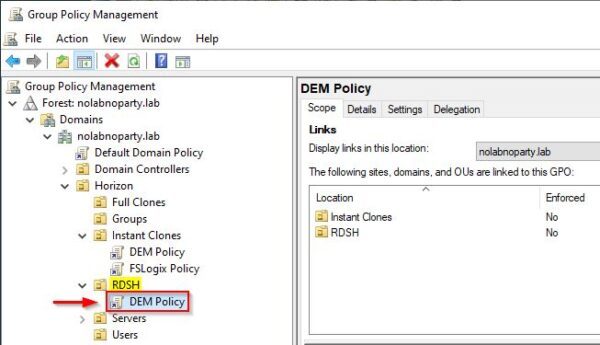
On a Domain Controller, open the Group Policy Management tool. Right click the OU containing the RDS Hosts and select Link an Existing GPO.
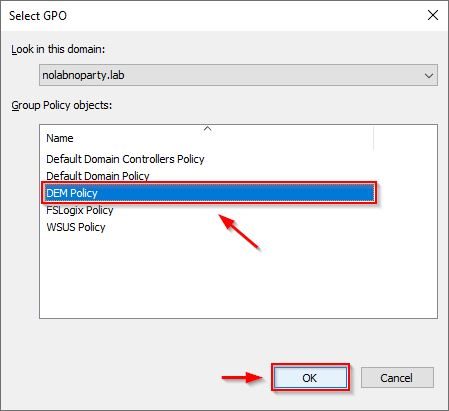
Select the appropriate GPO and click OK.
The applied GPO.
Create an Horizon Smart Policy in DEM
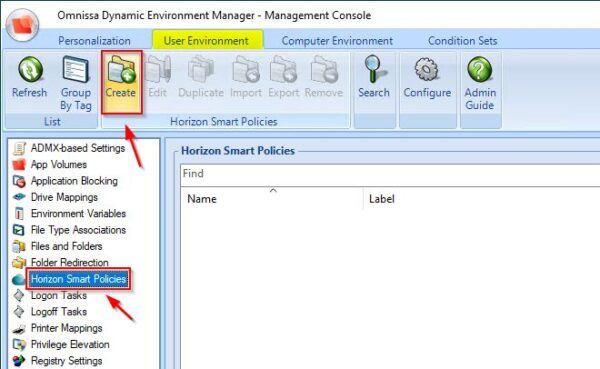
Open the Omnissa Dynamic Environment Manager tool and navigate to User Environment > Horizon Smart Policies. Click Create to make a new policy.
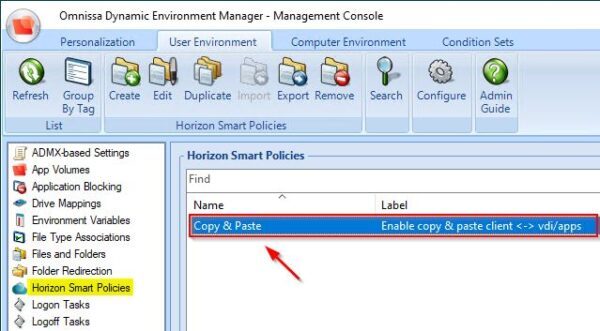
Enter a Name for the policy a Label to describe its functionality. Locate Clipboard under the Redirection section and select Allow all from the drop-down menu. Click Save.

The created policy.
Create a Condition Set
If other DEM policies should not apply to Published Apps, create a Condition Set to filter them.
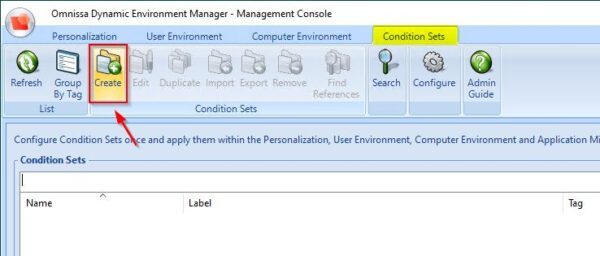
Go to Condition Sets and click Create to make a new policy.
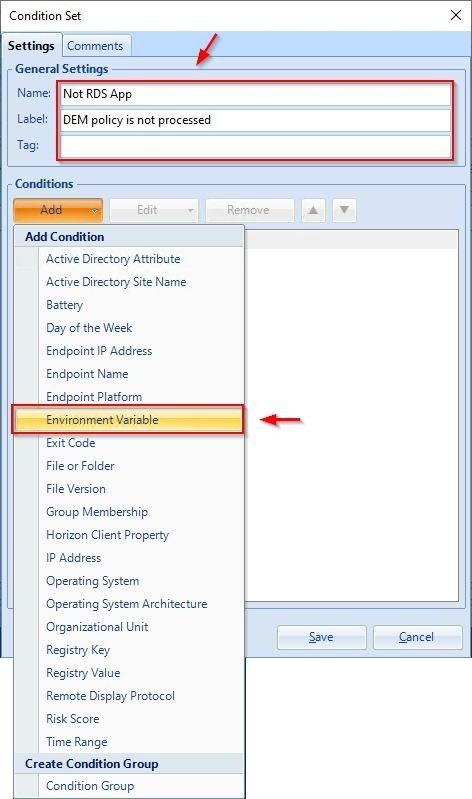
Enter a Name and a Label to describe its functionality. Click Add and select Environment Variable.
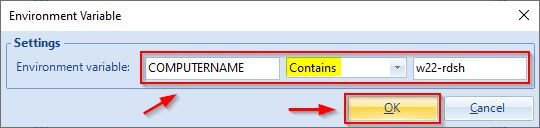
In the Environment variable field, type the name of the variable (e.g., COMPUTERNAME). From the drop-down menu, select Contains then specify the text that identifies the RDS Hosts (e.g., w22-rdhs). Click OK.
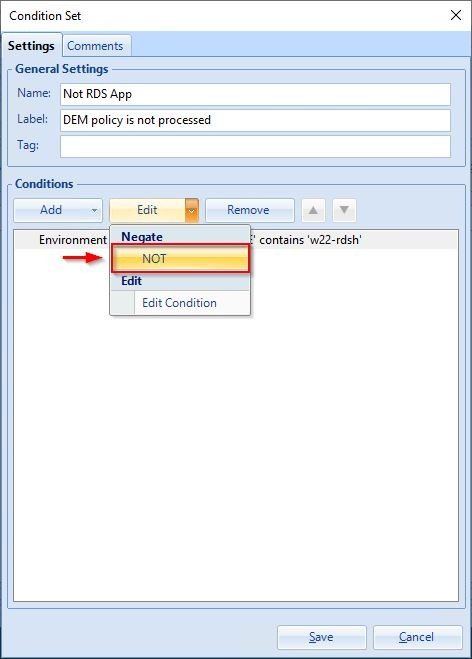
To exclude GPO from being processed with this variable, select the new condition and click Edit. Choose NOT to negate the condition.
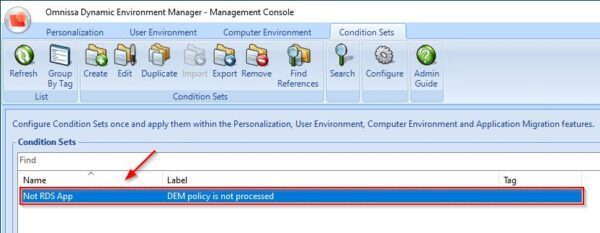
When the condition has been created, click Save to save the configuration.

The created Condition Set.
Apply the Condition Set
To apply this condition set to a policy open the GPO you want to filter (e.g., a Printer Mapping policy), go to Conditions tab. Click Add and select Condition Set.

Select the Condition Set created and click OK.
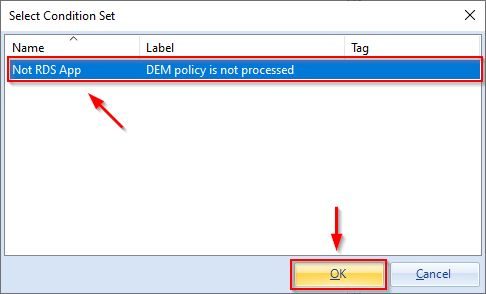
Ensure the AND operator is selected between any existing conditions and the new condition set. Click Save.

Test the configuration
Open the Published App again and highlight the text "test copy & paste from published app to client". Right click the text and select Copy.
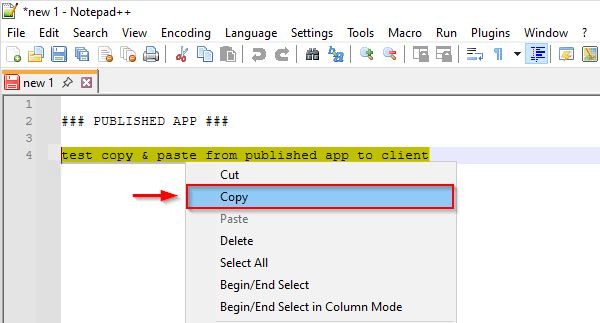
Go to your local application, right click and select Paste.

The text copied from the Published App will now be pasted correctly into the client. The copy and paste feature is now fully working.

Only enable this copy and paste feature if required, as it can potentially introduce security risks.