Installed and configured Trilead VM Explorer 6.0, the backup task can be manual or scheduled and the configuration is pretty straightforward requiring just a few clicks.
Recently it has been introduced also the copy backup feature that allows VM Explorer to copy the backup to another storage to keep a copy in a different location.
Blog series
Trilead VM Explorer 6.0 installation - pt.1
Trilead VM Explorer 6.0 setup - pt.2
Trilead VM Explorer 6.0 backup VMs - pt.3
Trilead VM Explorer 6.0 replication - pt.4
Trilead VM Explorer 6.0 restore VMs - pt.5
Manual Backup
To perform a quick backup of a single virtual machine, click Backup a Virtual Machine button from main screen.
Select the Host configured in part 2 then select the VM to backup. Set the Target options and the Nbr. of backup to keep then click OK to start the backup.
From main menu select Tasks > Task History to check the backup status.
The manual backup is displayed as Running. Double click the backup Name to display the details.
Details of the selected backup are shown. click OK to close the window.
When the backup completes without any issue, the Result is set as Success.
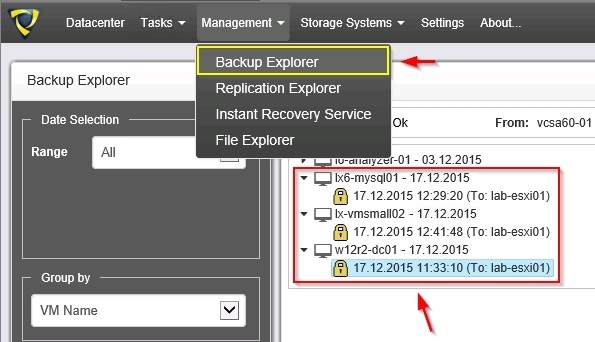
To check available backups, from main menu select Management > Backup Explorer.
In the left side you can also apply a filter to display the backups of a specific period.
Schedule a Backup Task
To perform automatic backups of multiple VMs, from the menu select Tasks > Scheduled Tasks to access the configuration window.
Before proceeding, we need to Enable the Scheduler by clicking on the button in the right side.
Click OK to confirm.
The scheduler is now enabled. Right click the area in the left pane and select Add Scheduled Task item.
Give a Task Name and set the required options in the Schedule section. Click OK when done.
The configured task appears under Scheduled Tasks section and the details are displayed in the right pane.
In the right pane click Add button to configure a Backup Task.
Click on Multi VM backup type.
Set the correct Host and click Select VMs button to select VMs to backup.
Select the VMs to backup and click Add. Click OK when done.
Configure the required Target options appending the suffix /{VM} in the Directory field to group backups with same VM's display name.
Select Files & Disks tab and set After backup convert as thin disk option to save space in the storage. Don't enable this option if you want to encrypt the backup.
In the Snapshot tab you define the Virtual Machine Snapshot Options and enabled the Storage Snapshot if your storage supports this feature.
In Connection tab you have the possibility to encrypt the backups with a password. Use this feature carefully because it has some restrictions and the risk to have unusable backups if the password is lost.
In Advanced tab set the options you want to have for Powered On and Suspended VMs.
Use the Verify Backup tab to set the Instant Backup Test to check if the backed up VM can be started. Click OK to save the backup configuration.
If Target Host is not set to Local Computer or Cloud, Instant Backup Test feature cannot be used.
Configured the Backup Task, click Add to setup the email alert.
Under Other section, click on E-Mail Report button.
Fill the required fields then click Test if you want to test the alert. Click OK to save the configuration.
The Backup Task configuration is complete.
To run the backup without waiting for the scheduled time, click on Run This Task Now button.
Click OK to start the backup.
Go to Tasks > Task History and double click on the running task to display the details.
Current task details are shown.
When the Backup Task has completed, go to Management > Backup Explorer to check the available backups.
Configure Backup Copy Task
A Backup Copy allows the administrators to copy main backup to another location to guarantee an higher level of security.
From Tasks > Scheduled Tasks, right click the area on the left pane and select the Add Scheduled Task item.
Give a Task Name and set the Schedule parameters then click OK.
Under Scheduled Tasks section, the new task has been created.
In the right pane, click Add to configure the Backup Copy task.
Under Copy Backup, select To Server option.
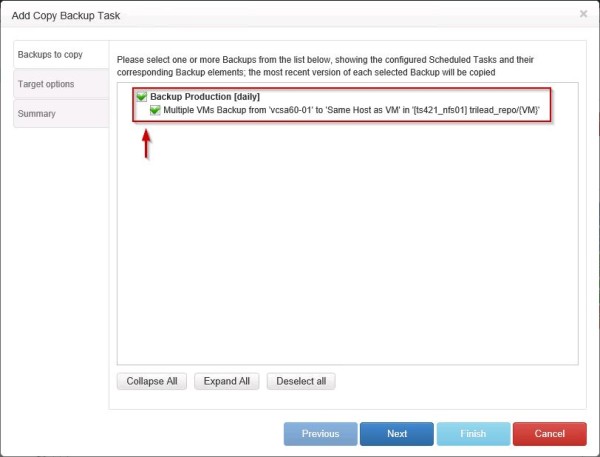
From the list select the backup to copy then click Next.
Select the Target Server and the Target Location through the Browse. Specify the number of copies to retain then click Next.
Click Save to save the configuration.
The Backup Copy setup is now complete and it appears under Task Elements area.
To manually start the task, click Run this Task Now button.
Click OK to start the Backup Copy.
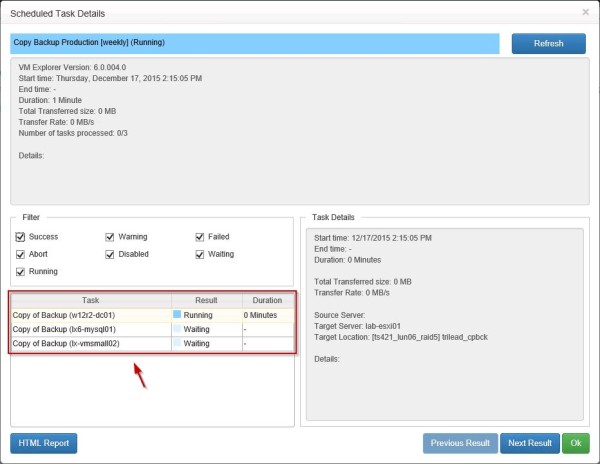
From menu Tasks > Task History, double click the running task name to display the details.
When the Copy Backup Task has completed, go to Management > Backup Explorer to check available backups. Copied backups are identified by (Copied) label.
Using the Backup and Backup Copy Task features, the 321 backup schema can be easily implemented to assure the highest protection level of data. Part 4 will cover the Replication Task configuration.


